
A Postgres schema is a namespace that holds the database objects like tables, functions, views, etc. Schemas assist us in organizing the database objects, controlling the database access, preventing unauthorized access, etc. Postgres automatically creates a schema named “public” whenever a new database is defined/created.
Quick Outlines
This post covers all the essential aspects of Postgres schemas using the following outlines.
- How to Create a Schema in Postgres
- How to Show Schemas in Postgres
- How to Alter a Schema in Postgres
- How to Drop a Schema in Postgres
- How to Modify the Schema Path in PostgreSQL
How to Create a Schema in Postgres
To create a new schema in Postgres, use the following syntax:
CREATE SCHEMA [IF NOT EXISTS] name_of_schema;
“IF NOT EXISTS” is an option that creates a schema only if the schema to be created doesn’t exist already.
Example 1: Creating a Postgres Schema Using psql
Open the psql, provide the login details, and execute the CREATE SCHEMA command to create a new schema, for example, “sample_schema”:
CREATE SCHEMA sample_schema;
The “CREATE SCHEMA” message in the output proves that the desired schema has been created successfully:

Example 2: Creating a Postgres Schema Using pgAdmin
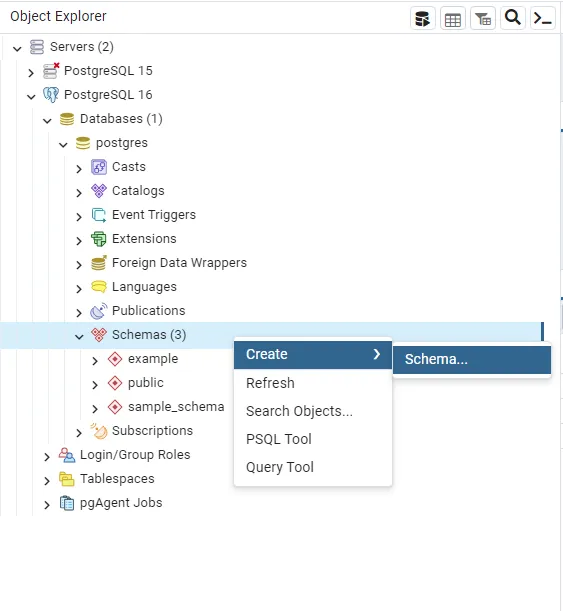
To create the schema using pgAdmin, navigate to the "schemas" tab and right-click on it, hover over the "create", and click on the "schema..." option:
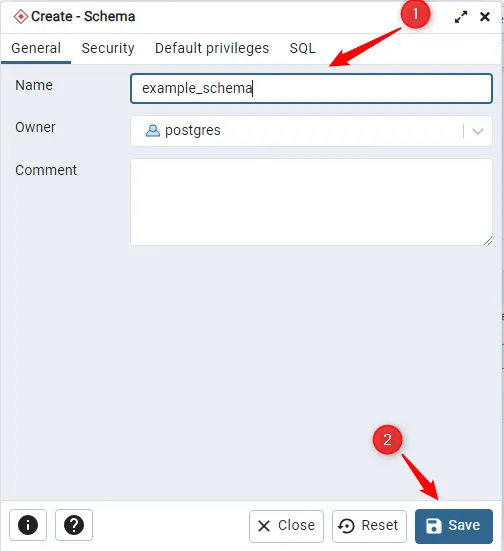
Upon doing so, a new window will pop up, type the desired schema name, and click on the "Save" button:
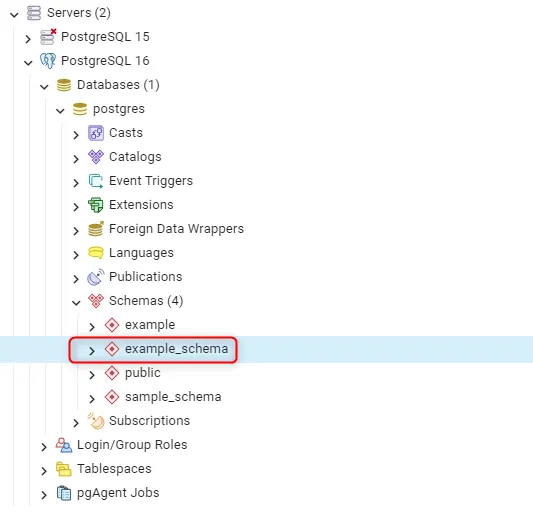
As soon as you click the "Save" button a new schema will be added to the schema list:
How to Show Schemas in Postgres
In SQL Shell, the “\dn” command is used/executed to show the already created schemas:
\dn;
The “\dn” meta-command retrieves all available schemas:

Open the pgAdmin, select the desired database, and expand the schemas section to see the available schemas using the GUI method:

How to Alter a Schema in Postgres
In Postgres, the ALTER SCHEMA command is used to modify an existing schema's definition. The stated command allows us to rename a schema and change the schema’s owner.
To rename a schema, use the below-provided syntax:
ALTER SCHEMA name_of_schema
RENAME TO new_name_of_schema;
To modify the schema’s owner, use the following syntax:
ALTER SCHEMA name_of_schema
OWNER TO new_owner;
Let’s put the ALTER SCHEMA command into practice.
Example 1: Changing Schema’s Name Using psql
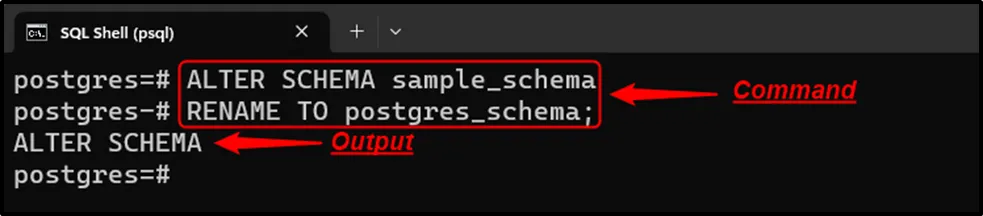
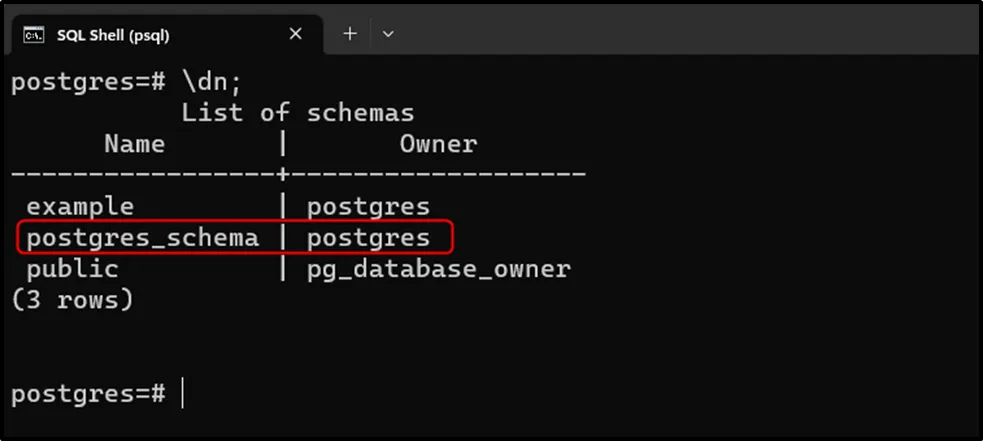
In the following code, the ALTER SCHEMA command is used to rename the “sample_schema” to “postgres_schema”:
ALTER SCHEMA sample_schema
RENAME TO postgres_schema;
Use the “\dn” command to verify the schema’s name:
\dn;
The output shows that the “sample_schema” has been successfully renamed to “postgres_schema”.
Example 2: Changing Schema’s Owner Using psql
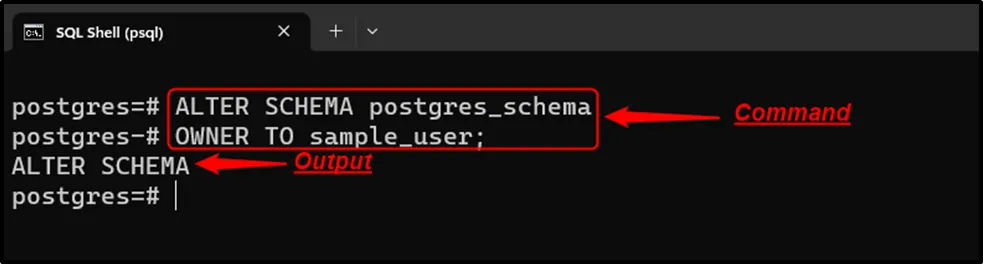
In the following code, the ALTER SCHEMA command is used to change the schema’s owner from “postgres_schema” to “sample_user”:
ALTER SCHEMA postgres_schema
OWNER TO sample_user;
Use the “\dn” command to verify the schema’s owner:
\dn;
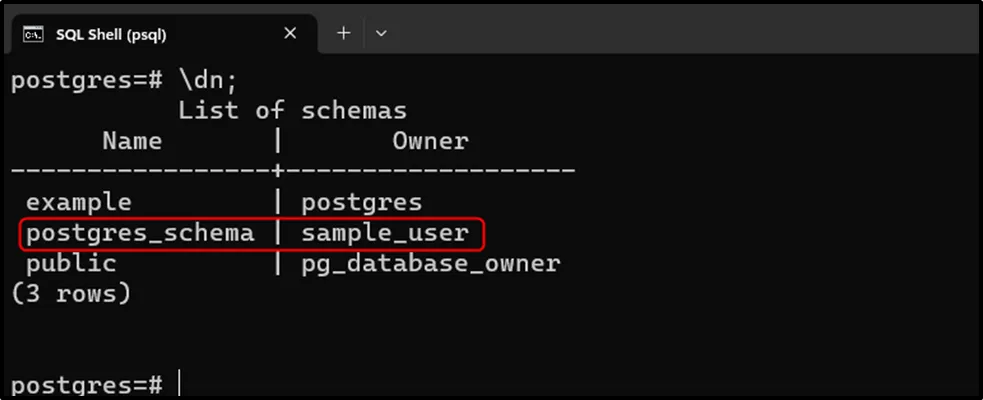
The schema owner has been successfully modified to “sample_user”.
Example 3: Alter Schema Using pgAdmin
To alter a schema using pgAdmin, navigate to the desired schema from the available schema list, right-click on it, and select the "Properties..." option:

Upon doing so, a new pop-up window for the selected schema will appear, alter the schema name or owner, and hit the "Save" button:

How to Drop a Schema in Postgres?
A particular schema can be dropped from a database using the DROP SCHEMA command, as shown in the following syntax:
DROP SCHEMA name_of_schema;
Example 1: Removing a Postgres Schema Using psql
In the following example, the “DROP SCHEMA” command is used to remove the “example” schema:
DROP SCHEMA example;

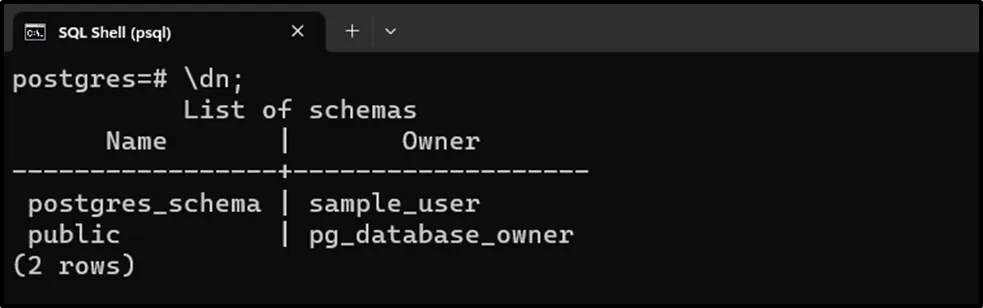
Use the “\dn” command to verify the schema’s removal:
\dn;
The selected schema has been removed successfully.
Example 2: Removing a Postgres Schema Using pgAdmin
Right-click on the schema to be removed from the list of available schemas and select either DELETE or DELETE (CASCADE) option to drop the unwanted schema:
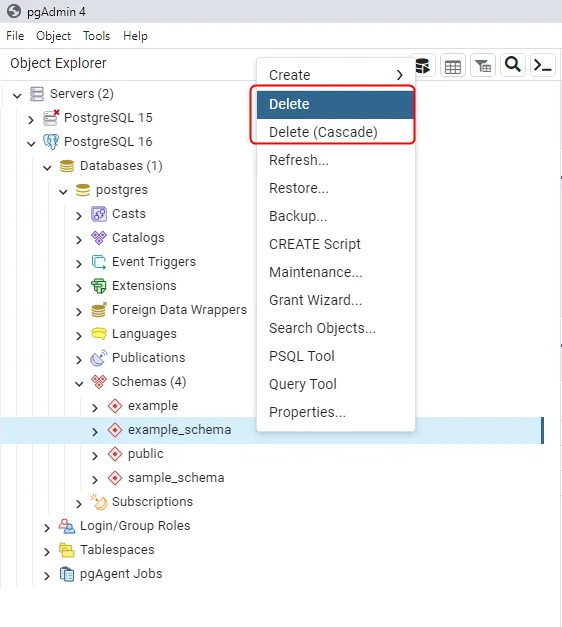
Doing so will prompt a confirmation message, click on the "Yes" option to get rid of the selected schema:

How to Modify the Schema Path in PostgreSQL
In Postgres, “public” is the default schema; however, it can be changed using the “SET SEARCH_PATH” command:
SET SEARCH_PATH TO 'name_of_schema';
Example: Setting a Schema
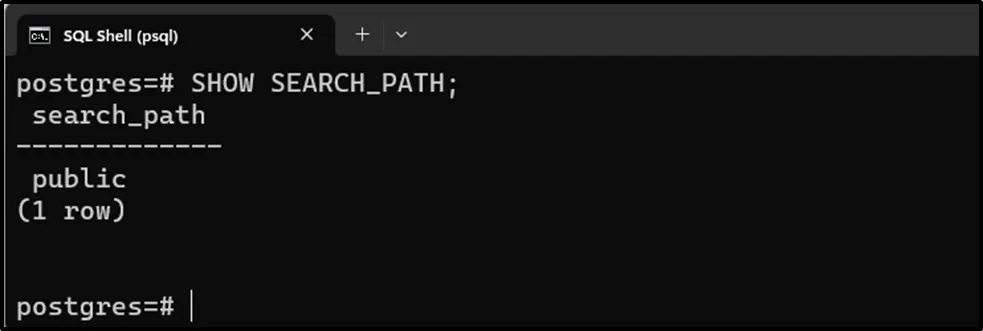
The “SHOW SEARCH_PATH” command is used to see the current schema:
SHOW SEARCH_PATH;
To change the “public” schema to “postgres_schema”, use the following command:
SET SEARCH_PATH TO 'postgres_schema';

Let’s check the current schema via the following command:
SHOW SEARCH_PATH;
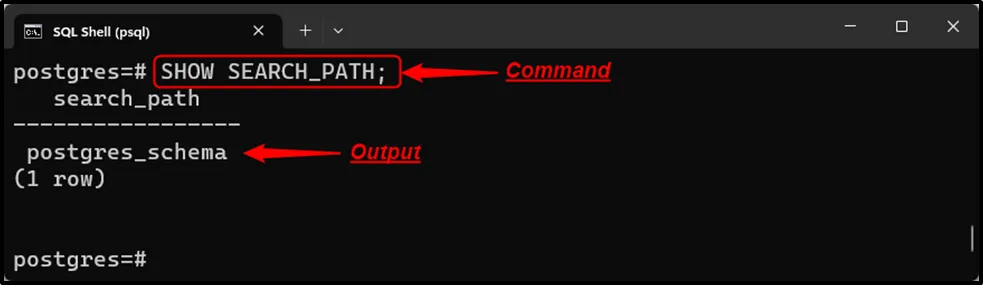
The current schema has been changed for the current session.
Read the following guide to learn how to change the default schema permanently.
Conclusion
Postgres offers various built-in commands, such as CREATE SCHEMA, ALTER SCHEMA, and DROP SCHEMA, to create, modify, and drop the Postgres schemas. Use the “\dn” command to show the available schemas. To alter/change the default schema, users must execute the SET SEARCH_PATH command followed by the schema name. This post presented a comprehensive guide on Postgres schemas using practical examples.

