
Microsoft offers an open-source, free-of-cost, and highly customizable code editor named Visual Studio Code (VS Code). It offers numerous features, including cross-platform support, extensive extensions, linting tools, debugging capabilities, and many more. With all these features, it remains a top choice for users/developers worldwide.
Postgres is a widely used feature-rich RDMS that comes up with its own command line and graphical interfaces. Despite having its CLI and GUI interfaces, users can also access Postgres from VS Code by installing the appropriate extension. Doing this will allow users to interact with PostgreSQL databases directly within the VS Code editor.
This post demonstrates a step-by-step process of connecting to Postgres from Visual Studio Code.
How to Connect to PostgreSQL From VS Code
An extension named “PostgreSQL” is used to connect to a PostgreSQL database from Visual Studio Code. It offers an interactive GUI to manage databases efficiently. Follow the below-provided step-by-step instruction to set it up:
Step 1: Install Postgres in VS Code
First, launch the VS Code, and press “CTRL + Shift + X” to open the Extensions view:

Head into “Search Bar”, type “Postgres”, select the “PostgreSQL” extension owned by Microsoft, and click on the “Install” button to begin the installation:

The installation process will be completed within a few minutes, and it will enable PostgreSQL in VS Code.
Step 2: Launch the Command Palette
Press the “Ctrl + Shift + P” to open the Command Palette. After that, search for “PostgreSQL: New Query” in the Command Palette and select the respective command from the drop-down:

After that, select a connection from the existing profiles or create a new connection profile:

Step 3: Provide the Connection Details
Specify the connection details like hostname, database name, user name, and so on:

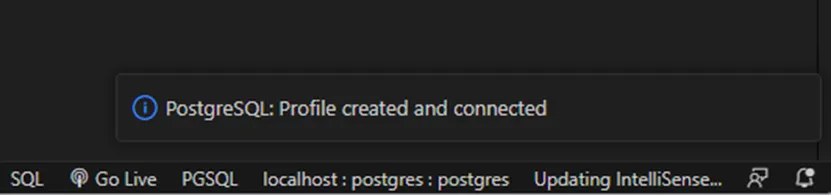
If everything goes fine, you will see the following “Profile created” notification on the right bottom side of the VS Code:
Step 4: Access and Use Postgres From VS Code
Now click on the “PostgreSQL” icon to open the PostgreSQL Explorer:

On clicking the “PostgreSQL” icon, the “PostgreSQL Explorer” Window will appear in the left pane of your “VS Code” editor. Click on the below-highlighted “+” icon, and specify the connection details in the database connection “palette”:
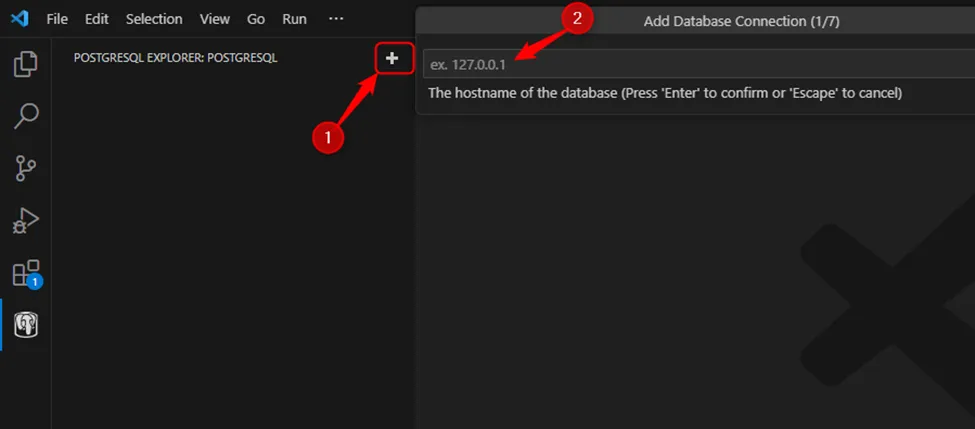
First, it will ask you to provide the hostname and hit the “Enter” button, in this case, we specify “localhost” as the hostname:

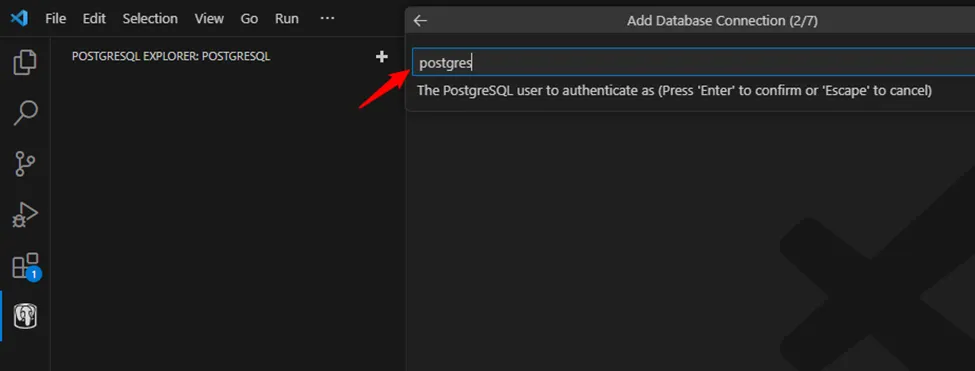
After that, specify the user name and hit the “Enter” button:
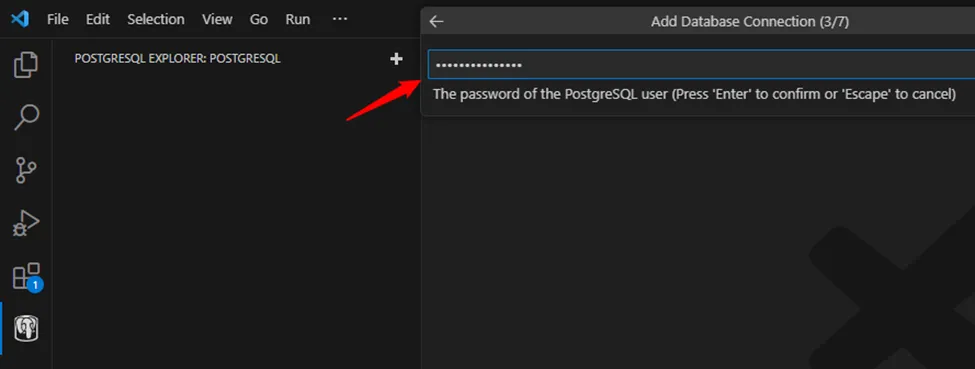
Next, provide the appropriate password for the specified user:
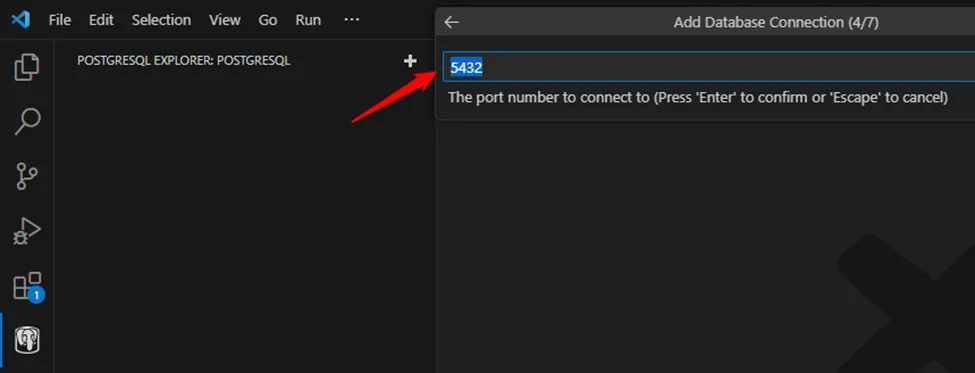
Leave the port number as default and hit the Enter button to proceed:
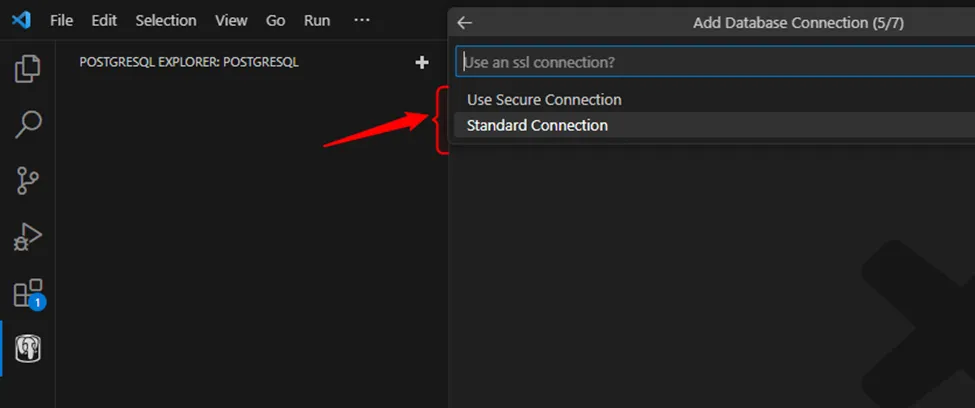
Now select a connection from the available options and hit the “Enter” button to continue, in this case, we select “standard connection”:
Select a specific database or click on “Show all databases”:

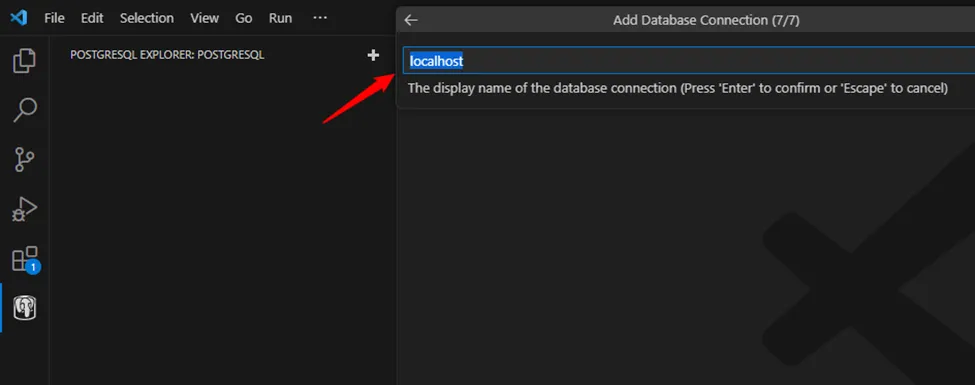
Leave the display name of the database connection as default and hit the “Enter” button:
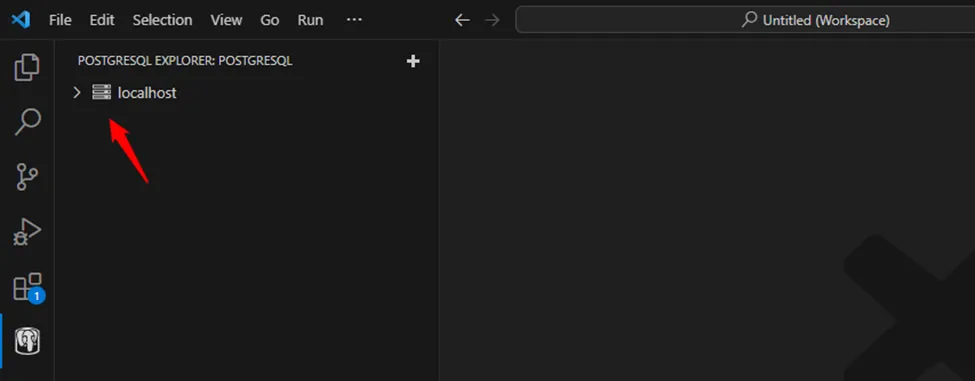
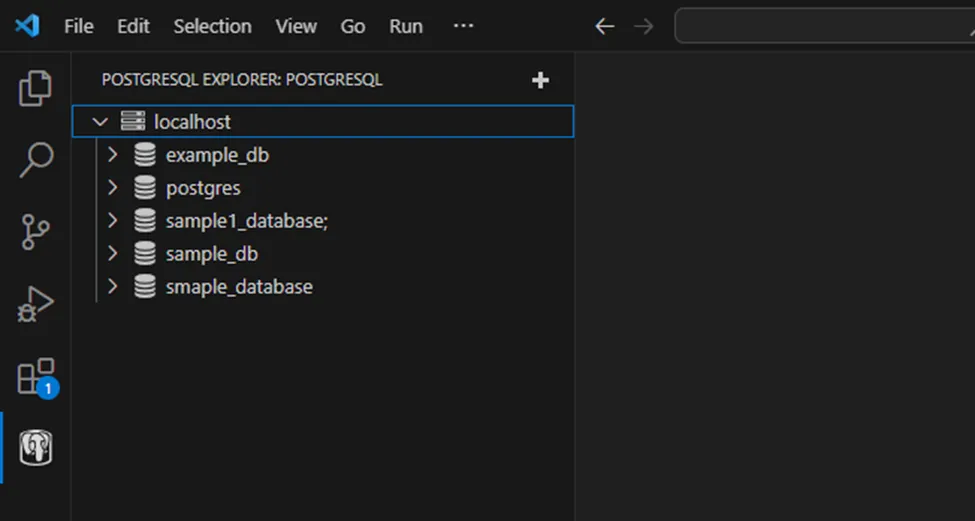
Upon doing so, a database tree will appear in the left pane:
Expand the tree to see more details about the available databases:
The output shows all the available databases, select the desired one and perform any database operation of your choice on that particular database.
That’s all about creating a Postgres profile and connecting to it using VS Code.
Conclusion
To Connect to PostgreSQL From VS Code, first, launch the VS Code, and press “CTRL + Shift + X” to open the Extensions view. Head into “Search Bar”, type “Postgres”, select the “PostgreSQL” extension owned by Microsoft, and click on the “Install” button to begin the installation. After that, press the “Ctrl + Shift + P” to open the Command Palette, search for “PostgreSQL: New Query”, and select the respective command from the drop-down. Specify the connection details like hostname, database name, user name, etc. Upon doing so, you will see the “Profile created” notification on the right bottom side of the VS Code.

