Whenever someone starts working with Postgres or any other database, one of the very first things is to learn how to create a database. Creating a table allows a user to perform different database operations, such as table creation, data fetching from existing tables, modifying existing tables, and many more. Therefore, PostgreSQL offers various database creation methods, including GUI-based and CLI-based options.
This write-up illustrates the Postgres database creation using the command line.
How to Create a Postgres Database From Command Line
We will explain the following methods to create a Postgres database using the command line:
- Method 1: Using SQL Shell
- Method 2: Using Terminal
So, let’s get started with the default Postgres CLI.
How to Create PostgreSQL Using SQL Shell
Postgres provides a default command line interface, known as “SQL Shell” or “psql”. It allows users to perform database operations using different commands and meta-commands. Follow the below-exhibited steps for a profound understanding:
Step 1: Launch psql
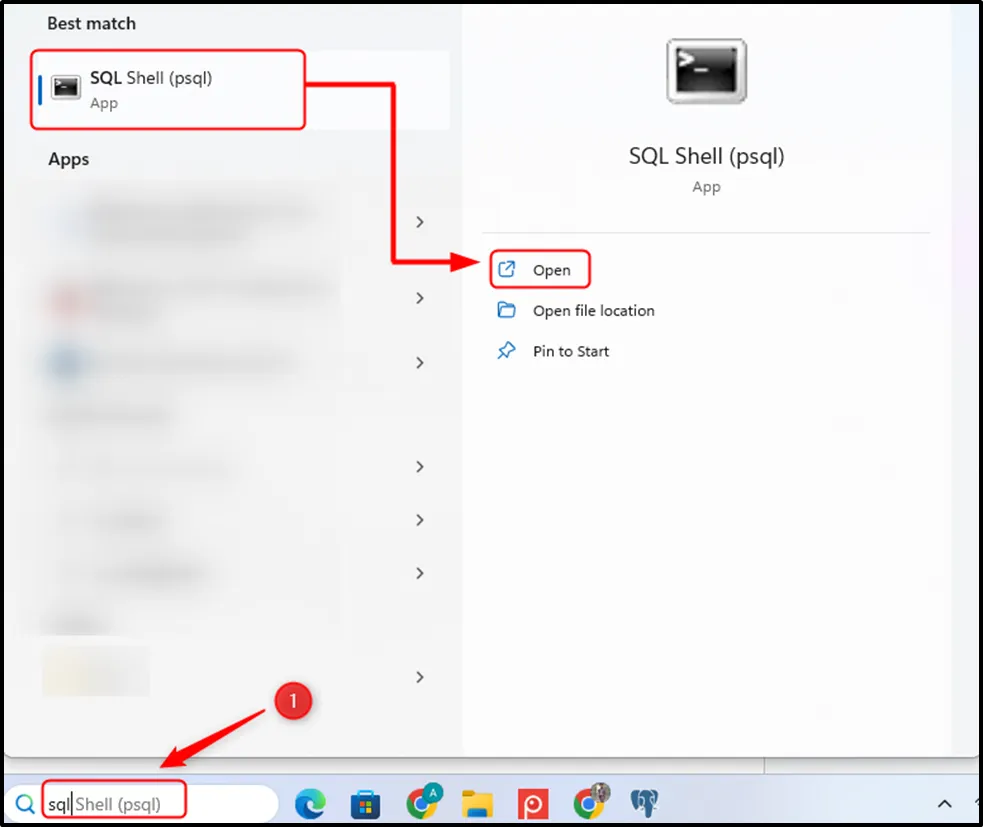
Search for “psql” in the search menu and hit the “Open” button to launch the SQL Shell:
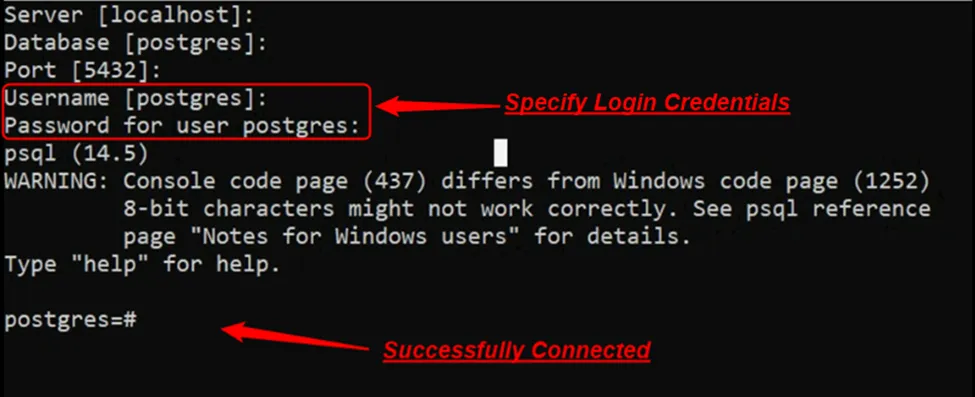
Upon doing so, the SQL Shell will open, provide the login details, and hit the “ENTER” button to access the Postgres:
Step 2: Check Available/Existing Databases
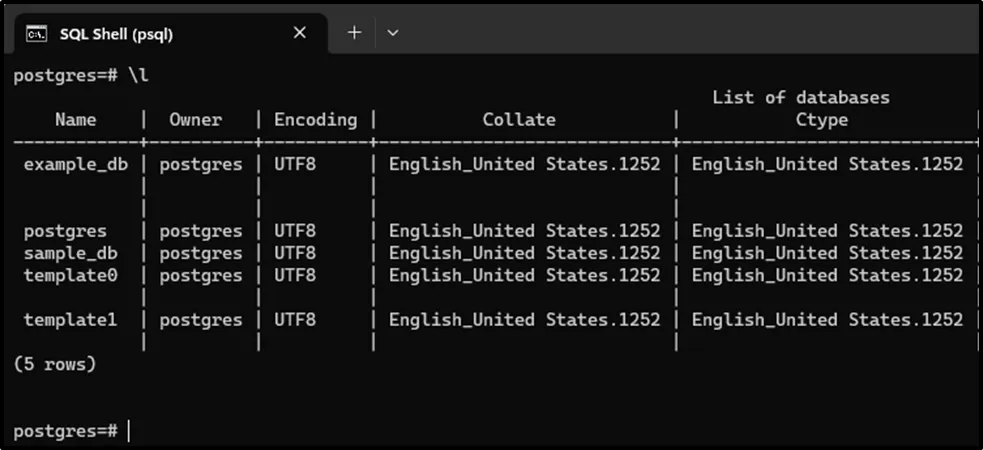
Once you are successfully connected to the “postgres” database, use the following meta-command to check the list of available/existing databases:
\l
Step 3: Create a Database Using Postgres Default CLI
Use the below-demonstrated syntax for the database creation:
CREATE DATABASE name_of_database;
Replace the “name_of_database” with the database name to be created. For instance, in the following snippet, the CREATE DATABASE command creates a new database named “smaple_db”:
CREATE DATABASE smaple_database;

Step 4: Confirm Database Creation
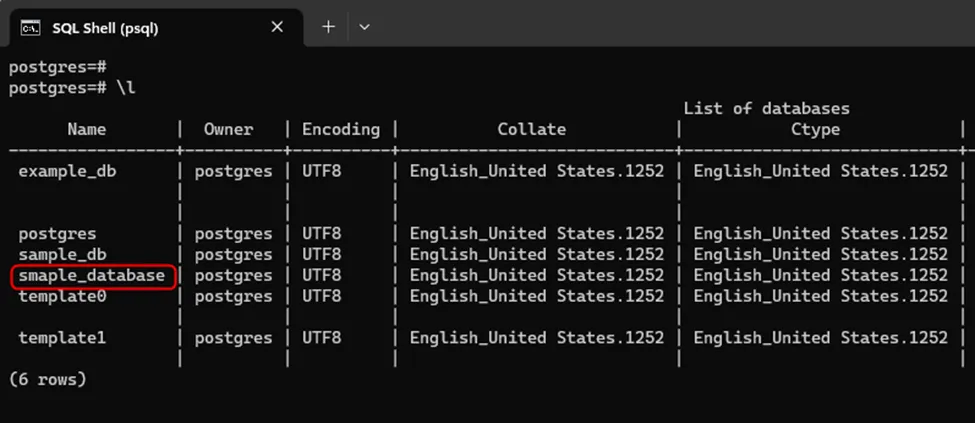
Type the “\l” command and hit the ENTER Key to confirm the database creation:
\l
The following snippet verifies the creation of the desired database:
How to Create PostgreSQL Using SQL Shell
Alternatively, users can execute the “createdb” command to create a database directly from the system’s terminal. For this purpose, use the below-demonstrated syntax:
createdb [option...] [database_name [description]]
Here, the option can be “–help”, “-D”, “-E”, “-e”, “-h”, “-I”, “-O”, “-p”, “-T”, “-U”, “-w”, or “-W”. The use of these options/parameters relies on the users’ requirements. For instance, use the “-h” to show the server’s hostname, use -D to specify tablespace for the database, use “-O” to determine who owns the database, and so on.
Follow the below-exhibited steps for a profound understanding:
Step 1: Access Postgres’ Bin Directory
Launch CMD and head into the Postgres bin directory by executing the “cd” command:
cd C:\Program Files\PostgreSQL\15\bin
Here, “15” represents the Postgres version; replace it according to the Postgres version installed on your system:

Step 2: Create Database
Type the “createdb” command and hit the “Enter” button to create a new database:
createdb -U postgres sample1_database;
Here, the “-U” option is used to specify the user name to be used for the connection:

The cursor moves to the next line without throwing any error, which indicates the successful execution of the stated command.
Step 3: Confirm Database Creation
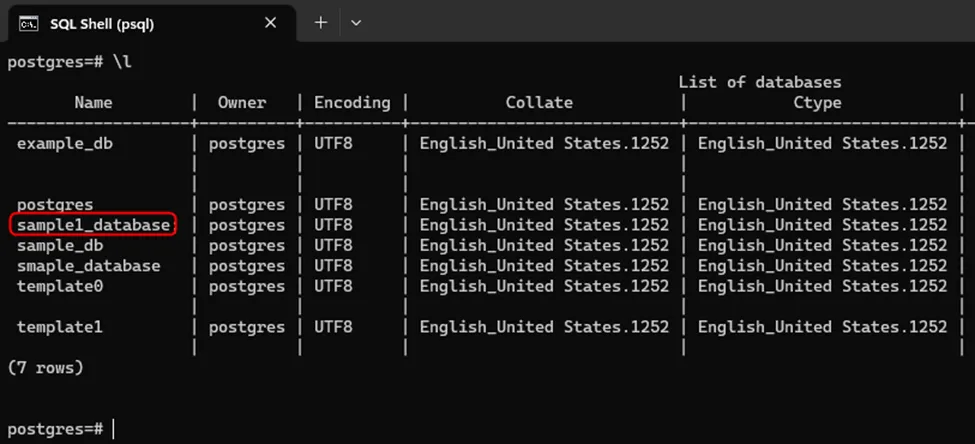
Now open the SQL Shell, type the “\l” command, and hit the ENTER Key to confirm the database creation:
\l
The createdb command confirms the successful creation of the desired database, i.e., “sample1_database”:
That’s all about creating a Postgres database from the command line.
Conclusion
PostgreSQL supports various commands to create a database from the command line, including “createdb” and “CREATE DATABASE”. For instance, executing the “CREATE DATABASE” command from SQL Shell creates a new Postgres database, while executing the “createdb” command from the system’s terminal serves the same purpose. This post has illustrated a couple of methods to create a Postgres database from the command line.


