
PostgreSQL is a well-known relational DBMS that provides a variety of features, such as built-in or user-defined functions, operators, data types, and many more. It is capable of running on numerous platforms, including Windows, Docker, and Linux. Moreover, users can also use PostgreSQL in Docker to easily create and manage the PostgreSQL database without installing it on the local host machine.
Try the new PgManage (Open Source) and get rid of PgAdmin!
Get 24x7 Enterprise Wide support for PostgreSQL and Open Source technologies
This article will demonstrate the method of creating a PostgreSQL database in Docker.
How to Create/Set up a Postgres Database With Docker?
To create a PostgreSQL database in Docker, check out the below-listed steps:
- Pull Official Postgres Image from Docker Hub
- Create and Run Postgres Container
- Verify Executing Container
- Interact With Postgres Container
- Connect to a PostgreSQL Database Server
- Create a PostgreSQL Database
- Confirm Database Creation
- Establish a Connection With a Database
- Create a Table in the Database
- Insert Records into a Postgres Table
- Fetch Table Data
Pull/Download Official Postgres Image From Docker Hub
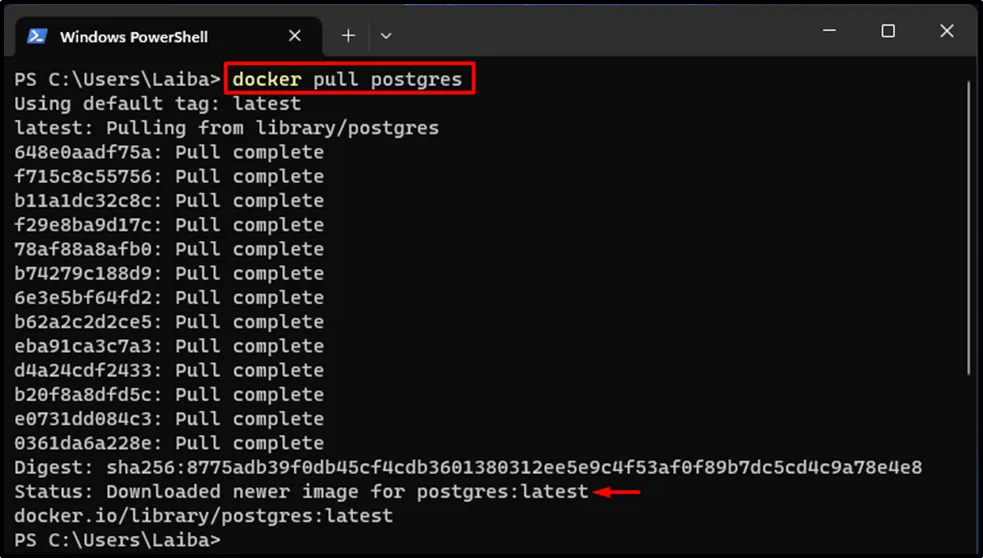
Launch the Windows PowerShell from the start menu and execute the below-provided “docker pull” command to download the official Postgres image from Docker Hub to your local system:
docker pull postgres
Executing the above-stated command will download the latest version of the Postgres image, as shown in the following output snippet:
Create and Run Postgres Container
Create and run the Postgres container using the Postgres image via the “docker run --name -d <cont-name> -p 5432:5432 -e POSTGRES_PASSWORD=<password> postgres” command:
docker run -d --name postgresCont -p 5432:5432 -e POSTGRES_PASSWORD=pass123 postgres
Here:
- “-d” flag specifies that the container should execute in the background.
- “--name” option assigns the container’s name, i.e., “postgresCont”.
- “-p” assigns the port for the container i.e. “5432:5432”.
- “-e POSTGRES_PASSWORD” configures the password to be “pass123”.
- “postgres” is the official Docker image:

Upon doing so, the Postgres container has been created and started.
Verify Executing Container
Ensure that the Postgres container is built and currently executing via the given-provided command:
docker ps

The above output indicates that the “PostgresCont” container is running.
Interact With Executing Container
Type out the “docker exec -it <cont-name> bash” command and specify the executing Postgres container name to open the shell within it:
docker exec -it postgresCont bash

Subsequently, the “PostgresCont” container has been accessed and now we can run commands in it.
Connect to a PostgreSQL Database Server
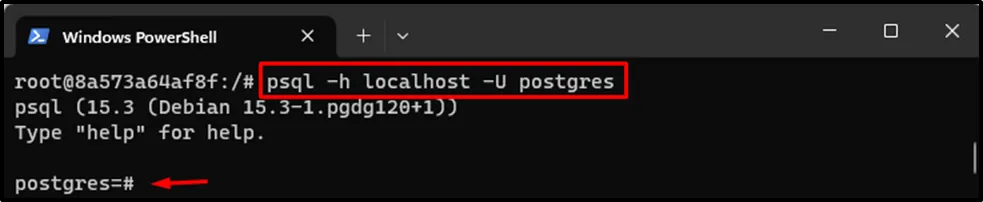
Execute the “psql” command along with the hostname and user name to make a connection with the Postgres Database Server:
psql -h localhost -U postgres
Executing the above-stated command will take us to the SQL Shell, where we can execute/run SQL queries and psql commands:
Create a PostgreSQL Database
Now we are all set to create a new Postgres database. For this purpose, use/execute the “CREATE DATABASE” command along with the database name. For instance, we are creating a database named “tsl_employee”:
CREATE DATABASE tsl_employee;

Confirm Database Creation
Display all the databases to view the newly created database:
\l
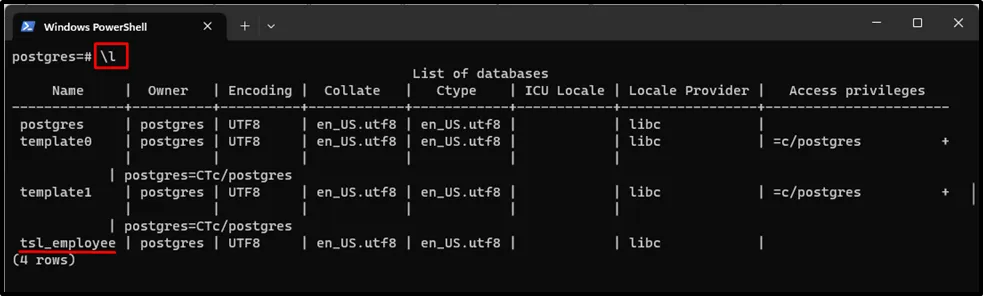
It can be seen that the “tsl_employee” database has been created successfully.
Establish a Connection With a Database
Type out the “\c” meta-command along with the database name of your choice to establish a connection with it. For instance, we want to connect to the “tsl_employee” database:
\c tsl_employee;

A connection has been successfully established with the specified database.
Create a Table in the Database
To make a new table in the selected database, utilize the “CREATE TABLE <table_name>(col_1 <data_type>, col_2 <data_type>, col_3 <data_type>,..., col_N <data_type>);” command. Where table_name represents a table to be created, col_1, col_2, …, col_N are the column names, and data_type represents any valid data type. Here, we are creating a table named “tech_authors”:
CREATE TABLE tech_authors(ID INT PRIMARY KEY NOT NULL, NAME TEXT NOT NULL, TYPE TEXT NOT NULL, CATEGORY TEXT NOT NULL, ATICLES INT NOT NULL);
Executing the “CREATE TABLE” command will create a new table with the desired columns:

Insert Records into a Postgres Table
Use the “INSERT INTO <table_name> VALUES (value_1, value_2, value_3, ...);” command for inserting new records into the newly created table. For instance, we have inserted the following values:
INSERT INTO tech_authors VALUES (1, 'Laiba', 'Senior', 'Docker', 50);

Fetch Table Data
Write out the provided command to view the specific table’s data:
SELECT * FROM tech_authors;
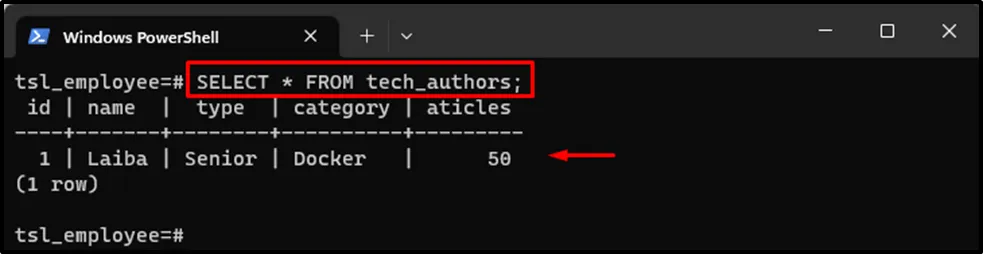
In the above screenshot, the data of the “tech_authors” table can be seen.
Conclusion
To create a PostgreSQL database in Docker, first, pull/download the official Postgres image using the “docker pull postgres” command. Then, create and start the Postgres container via the “docker run --name -d <cont-name> -p 5432:5432 -e POSTGRES_PASSWORD=<password> postgres” command. After that, access the Postgres container and make a connection with the desired database. Next, create a Database utilizing the “CREATE DATABASE <database-name>;” command. Furthermore, users can create tables in the database, insert values, and select data from the database.
Related Articles
How to Create a Database in Postgres

