
Triggers are the functions that are fired/invoked when a certain specified event occurs. In Postgres, we can manipulate the triggers using different commands, such as CREATE TRIGGER, DROP TRIGGER, etc. Users can enable, disable, alter, create, or drop a trigger according to their needs.
In this article, we will particularly talk about dropping a trigger from the table, which means deleting a trigger that is associated with the table.
How to Drop a Trigger in PostgreSQL?
In PostgreSQL, we use the DROP TRIGGER statement to remove a trigger from a database table. Below given is the basic syntax for this particular statement.
DROP TRIGGER [IF EXISTS] trig_name
ON tab_name [ CASCADE | RESTRICT ];
In the above syntax:
- After the DROP TRIGGER statement, specify the name of the trigger that you want to drop,
- IF EXIST is a condition that drops a trigger only in a condition if it exists. Note that if we want to delete a trigger that does not exist, it will result in an error. To overcome this problematic situation we use the IF EXIST statement. When we want to drop a trigger by using the IF EXIST statement, and if that trigger is not present it would simply raise a notice rather than throwing an error.
- We need to write the table name after the ON command.
- The CASCADE option is used if we also want to drop the objects that depend on the trigger automatically. It will also delete the object that depends on the objects depending on the triggers.
- Or else we use the RESTRICT statement. The RESTRICT statement restricts dropping the objects that depend on triggers. By default, the DROP TRIGGER statement in PostgreSQL used the RESTRICT statement.
Here one thing to be remembered is that the trigger names are not limited to the tables so we can write the syntax simply as:
DROP TRIGGER trig_name;
Example
Let’s consider an example of the database table possessing the status of the projects being developed in a software house. Let's suppose the query for the table is as follows:
Step 1: Create a table
First, we will be creating a table named "project_status".
DROP TABLE IF EXISTS project_status;

CREATE TABLE project_status(
 id INT GENERATED ALWAYS AS IDENTITY,
   proj_name TEXT NOT NULL,
   proj_status TEXT NOT NULL,
   managed_by TEXT NOT NULL,
   PRIMARY KEY(id)
);
And insert these values into the table.
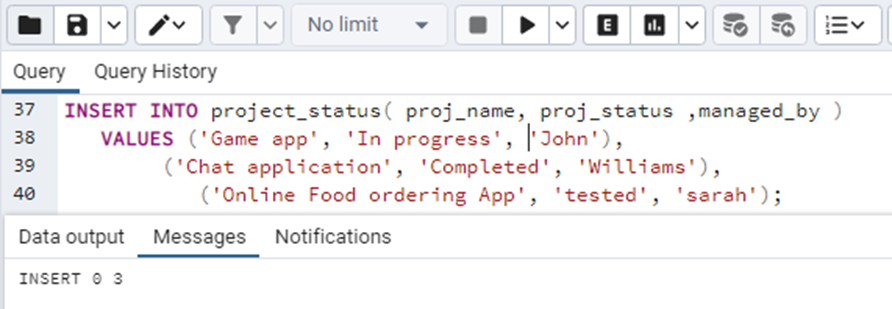
INSERT INTO project_status( proj_name, proj_status ,managed_by )
 VALUES ('Game app', 'In progress', 'John'),
      ('Chat application', 'Completed', 'Williams'),
           ('Online Food ordering App', 'tested', 'sarah');
The table is successfully created and the values are inserted in the table.
Step 2: Create a Trigger Function
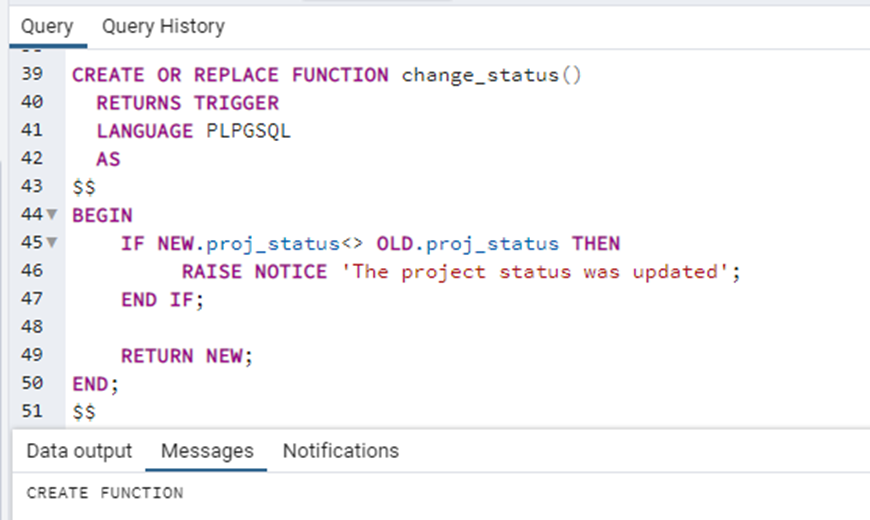
We will now write a query for the creation of the trigger function.
CREATE OR REPLACE FUNCTION change_status()
 RETURNS TRIGGER
 LANGUAGE PLPGSQL
 AS
$$
BEGIN
 IF NEW.proj_status<> OLD.proj_status THEN
   RAISE NOTICE 'The project status was updated';
 END IF;

 RETURN NEW;
END;
$$
The query is working as the function returns a trigger. The OLD keyword refers to the status of a row, i.e. proj_status in this case, before the triggering event has occurred. The NEW keyword refers to the status of a row after the triggering event. So what the code actually does is, it says that if the proj_status (which is a row in the table) before and after the trigger event (that is” update” in this case we will have a look at it) are not equal( <> ) then it will raise notice that “The project status was updated”.
Step 3: Create a Trigger
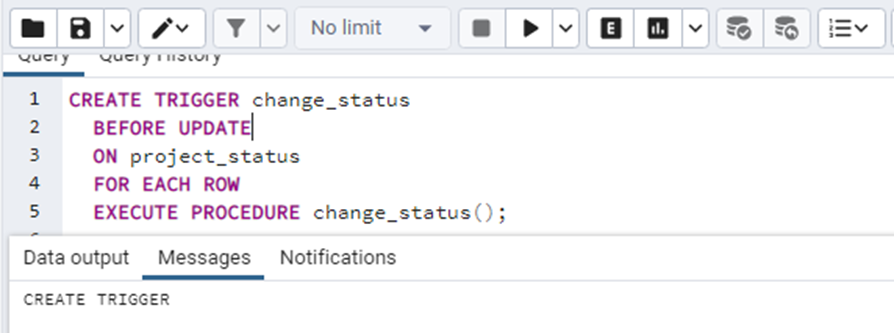
We will now be binding the trigger to the table. Consider the following query:
CREATE TRIGGER change_status
 BEFORE UPDATE
 ON project_status
 FOR EACH ROW
 EXECUTE PROCEDURE change_status();
The trigger is created with the name “change_status” and it is specified that the trigger needs to be executed before the update command. The trigger has to be fired on the table”project_status” on each row. After EXECUTE PROCEDURE we write the trigger function declared above.
The trigger is successfully created:
Step 4: Fire the Trigger
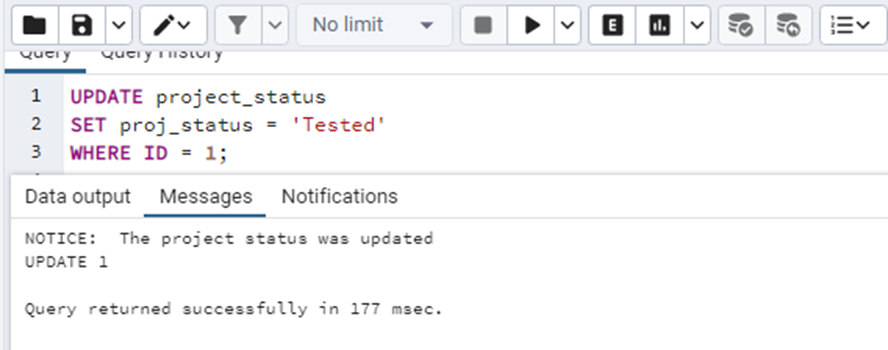
To bring the trigger in action we will update a value from the table. Consider the case, if we update the status of the project with ID 1 from “in Progress” to “completed” we will write the following query:
UPDATE project_status
SET proj_status = 'Completed'
WHERE ID = 1;

SELECT * FROM project_status;
The project status of the project with ID number 1 has been successfully updated:
Now go to the tables of your respective database in the side panel. And within the table, you are currently working with, you will see your triggers. Now if your recently created trigger should be present there. If not refresh the table by right-clicking on it. Your trigger can be seen there if it is created.
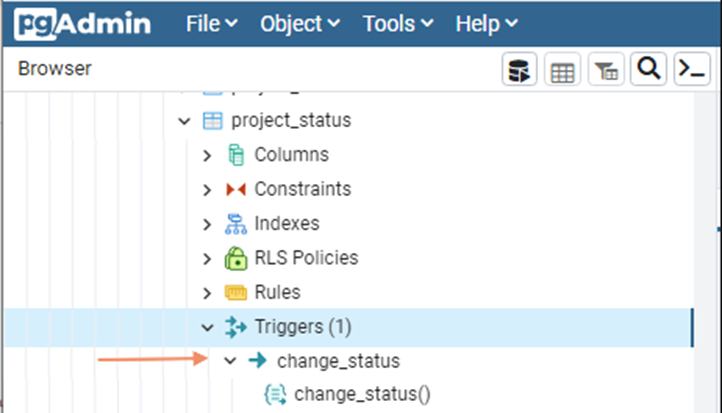
In the above side panel image, we can clearly see that the created trigger is present under the triggers category. Which simply means, the trigger has been created.
Step 5: Drop Trigger
Now we will see if the drop trigger command works or not. Following will be the query for our considered case:
DROP TRIGGER change_status
ON project_status;
The trigger is successfully dropped using the above query:

We can also verify this from the side panel. Refresh your table to check for changes.
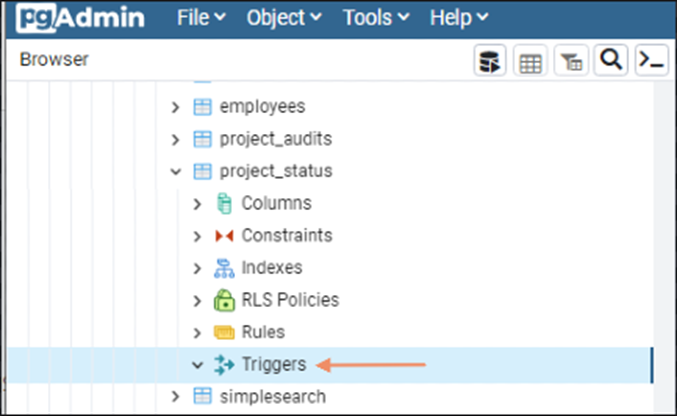
You will observe that there would be no trigger that you have dropped from the table.
Conclusion
We can drop a trigger from the table by specifying the name of the trigger and the name of the table to which it is associated. Moreover, there are other keywords that are also used such as the IF EXISTS keyword that would drop the trigger if it exists if it is not then it will just raise a notice. CASCADE will drop the object related to that trigger whereas RESTRICT will avoid dropping objects.