
PostgreSQL is a widely used relational DBMS that is designed to efficiently store, handle, and retrieve large amounts of data in a structured manner. Docker Compose is a tool that enables users to define and run multiple container applications with the help of a YAML file. Users can easily install PostgreSQL by utilizing Docker Compose.
This write-up will illustrate the process of installing PostgreSQL using Docker Compose.
How to Install PostgreSQL Using Docker Compose?
To install PostgreSQL using Docker Compose, try out the below-mentioned steps:
- Create/Make Docker Compose File
- Run the Postgres Container
- Verify Executing Container
- Interact With Executing Container
- Establish a Connection With a Database
- Execute psql Commands
Step 1: Create Docker Compose File
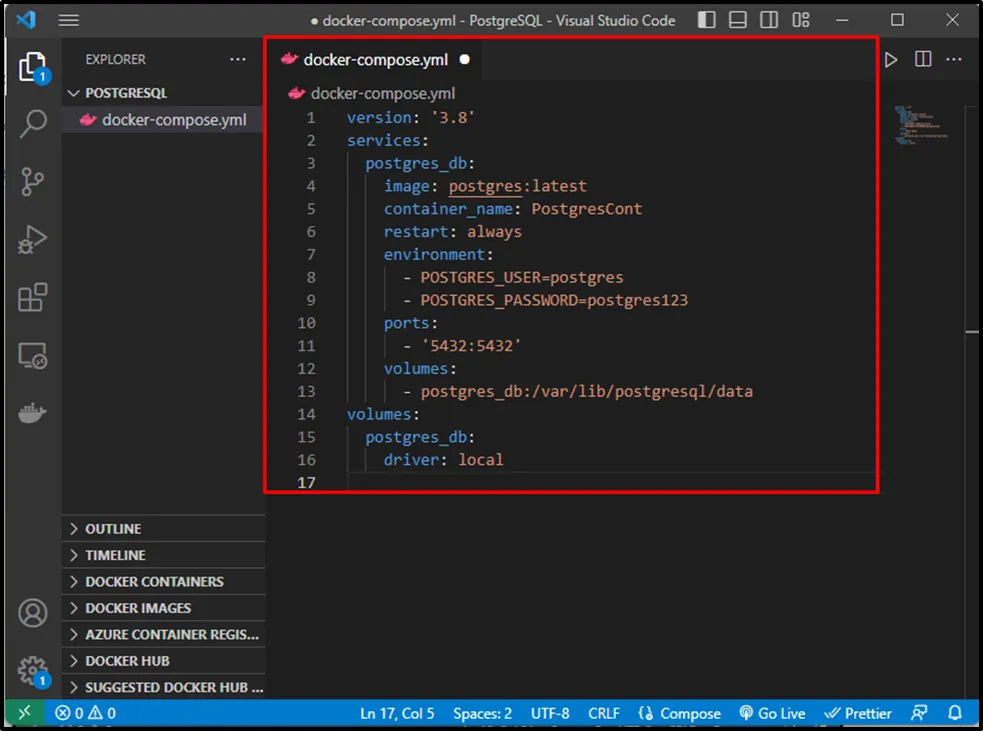
Open Visual Studio Code and create a “docker-compose.yml” file. Then, define the desired services in the compose file. For instance, we have specified the following services:
version: '3.8'
   services:
  postgres_db:
  image: postgres:latest
  container_name: PostgresCont
  restart: always
  environment:
  - POSTGRES_USER=postgres
  - POSTGRES_PASSWORD=postgres123
  ports:
  - '5432:5432'
  volumes:
  - postgres_db:/var/lib/postgresql/data
   volumes:
  postgres_db:
  driver: local
Here:
- “version” specifies the Docker Compose file’s version. In our case, it is “3.8”.
- “services” defines the services that need to be executed with Docker Compose.
- “postgres_db” is the Postgres service’s name.
- “image” defines the image to utilize i.e. “postgres:latest”.
- “container_name” represents the container name i.e. “PostgresCont”.
- “environment” sets the username and root password for the Postgres container.
- “ports” allocates port i.e. “5432:5432”
- “volumes” set up a volume to persist the Postgres data:
Step 2: Run the Postgres Container
Type out the given command to start the Postgres services defined in the Docker compose file:
docker-compose up -d

The above command has created and started the Postgres container.
Step 3: Verify Executing Container
Ensure that the Postgres container is built and currently executing via the given below command:
docker ps

It can be seen that the “PostgresCont” container is executing efficiently.
Step 4: Interact With Executing Container
Type out the “docker exec -it <cont-name> bash” command and specify the executing Postgres container name to open the shell within it:
docker exec -it PostgresCont bash

Subsequently, the “PostgresCont” container has been accessed and now we can run commands in it.
Step 5: Establish a Connection With a Database
To connect and access the database server, utilize the below-listed command:
psql -h localhost -U postgres

After that, we can execute/run SQL queries and psql commands in the SQL shell.
Step 6: Execute psql Commands
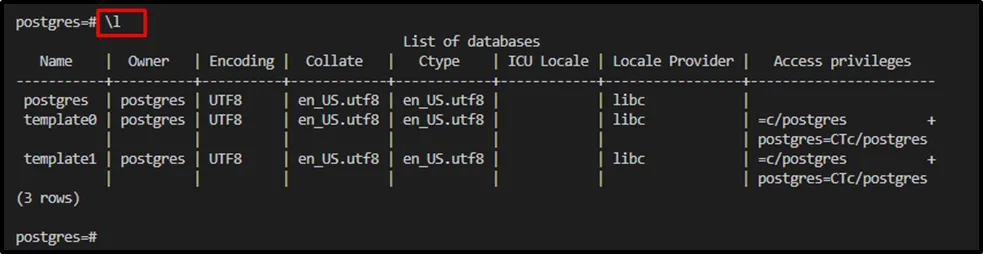
Finally, execute the psql commands in the PostgreSQL container. For instance, we are executing the “\l” command to list available databases:
\l
We have efficiently installed PostgreSQL using Docker Compose.
Conclusion
To install PostgreSQL using Docker Compose, first, create a Docker compose file and specify the desired services. Then, start the compose service to build and execute the Postgres container. After that, interact with the executing container and access the PostgreSQL database server. Lastly, execute psql commands. This write-up has demonstrated the method to install PostgreSQL using Docker Compose.

