
The SQL Shell, better known as psql is an interactive command line interface or a terminal on which the PostgreSQL queries are run. We can administer the PostgreSQL using the psql.This will teach us to execute the PostgreSQL queries in psql.
Let’s get started with the learning.
How to Run PostgreSQL Queries in psql?
The psql can be used as an alternative for the GUI-based PostgreSQL management tools, for writing and executing PostgreSQL queries. To run the PostgreSQL queries in psql, firstly we have to create a connection with database. This can be done in two ways:
Method 1: Connection With the Database Using Command Prompt
We can use the command Prompt to connect to the database. Open the cmd. To make sure your psql is installed you can run “psql --version”. Running this will ensure the psql installation by retrieving the version of your psql. In my case, it gave the output as:
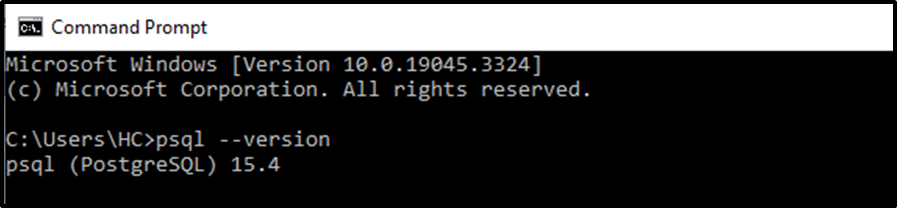
It means that psql version 15.4 is installed in my system. Next, run the following pattern customized according to your case to make a connection to the database:
psql -d database_name -U username
Where “-d” is the shorthand notation for the database name and “-U” for username.
By default, when we install PostgreSQL, the database and username are created as “Postgres”. So we run the following query to get connected to that database:
psql -d postgres -U postgres
Executing this command in the CMD prompts you to enter the password, this password is the same that you chose to install PostgreSQL on your system. After you enter the correct password, the connection with the database will be successfully established.
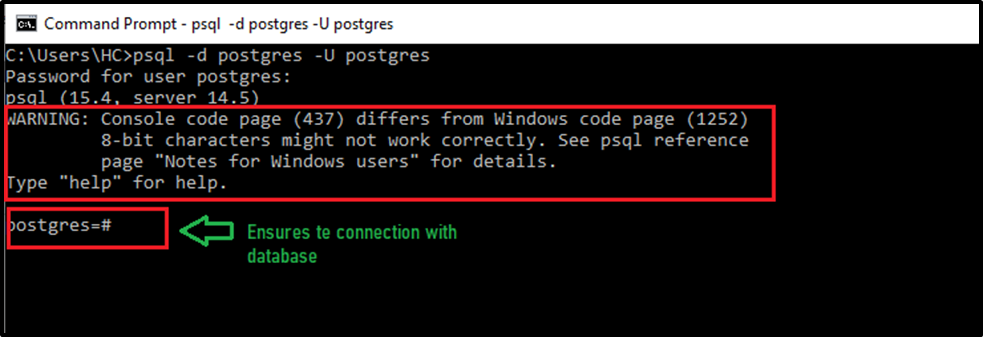
If the “postgres=#” appears, this confirms the connection with the database.
We can do the same thing with another approach.
Method 2: Connection With the Database Using psql
This method is easier than the first one. Simply just launch the psql application. After doing so, the application will prompt you to enter the server, database, port, username, and password. You can skip the first 4 fields by pressing the “Enter” key from the keyboard. The application will then prompt you to enter/insert the password. You need to enter the password, this password is the same that you chose to install PostgreSQL on your system. After you enter the correct password, the connection with the database will be successfully established.
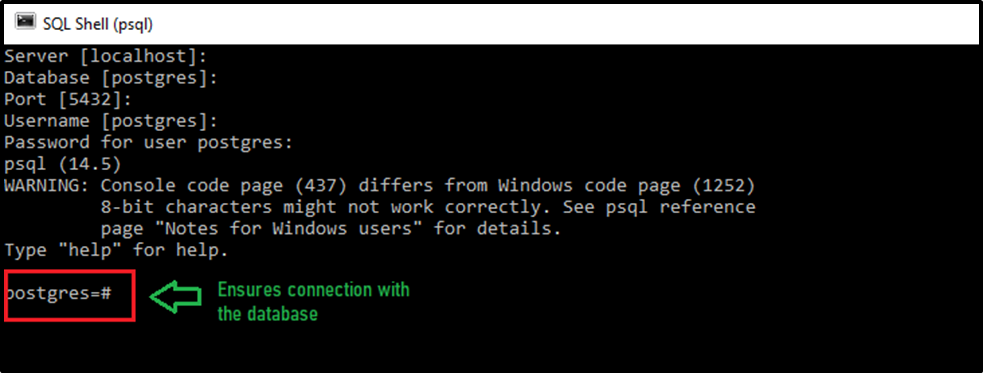
Again the “postgres=#” confirms the database connection.
Till now, we have successfully connected to the database. Now we can get started with the psql.
Getting Started With psql
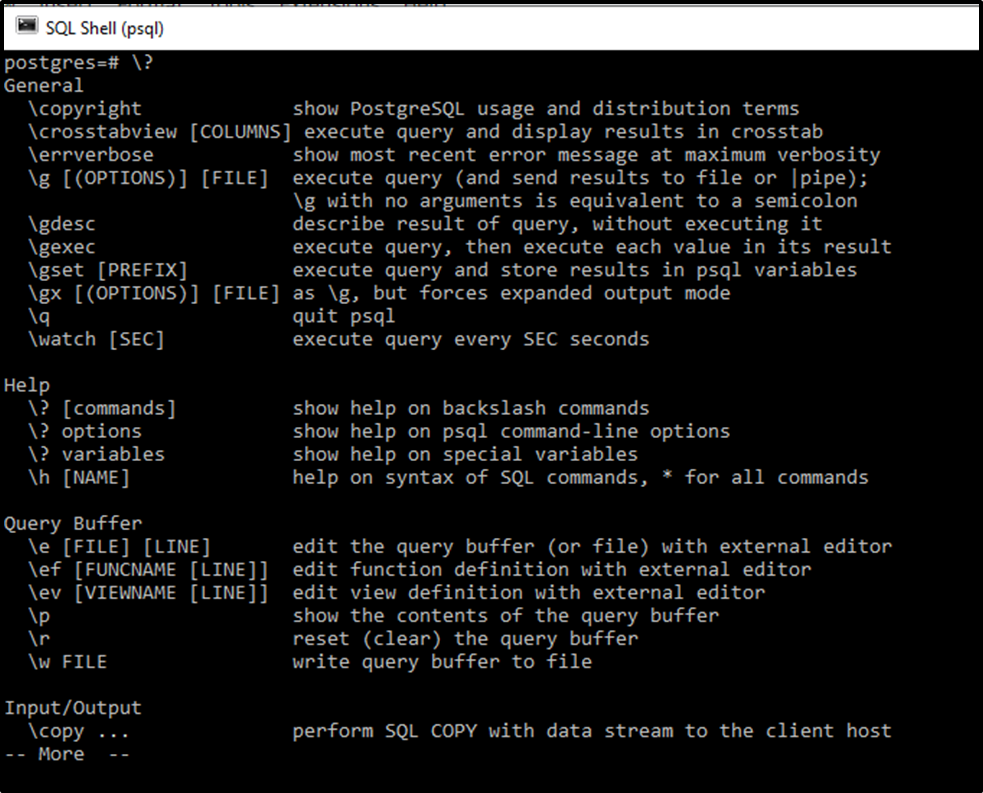
There are various meta-commands that we use in psql. The basic meta-command that can be used to get help is:
\?
Running this meta-command will provide you with some assistance with the other meta-commands. It will return meta commands for psql like this:
We have already discussed the psql meta-commands in another article. You can head over to that article to understand them in detail.
Now we will be studying how to use the DDL and DML queries in psql.
Using DDL and DML in psql
We can also use the DDL and DML that are used in PostgreSQL in psql as well.
We can create, update, and delete the database, table, etc. using these commands and queries. To proceed with this article we will be running the PostgreSQL DDL and DML queries in psql. Let’s see how these queries work in psql.
Creating a Database
We can create a database in psql by executing the following command.
CREATE DATABASE db_name;
Let's create a database named “psql_database”. The query written for this purpose will be:
CREATE DATABASE psql_database;
This query will successfully create a database which can be ensured by the following output:

We can see all the created databases in our system by running the following command:
\l
Executing this command will return all the listed databases present.
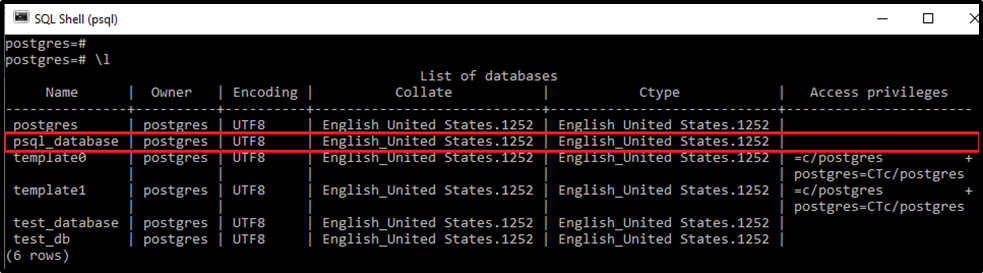
We can see that our recently created database is present in the list of databases, which can also ensure its creation.
Deleting a Database
We can also drop an existing database same as we can do in pgAdmin. The general syntax looks like this:
DROP DATABASE db_name
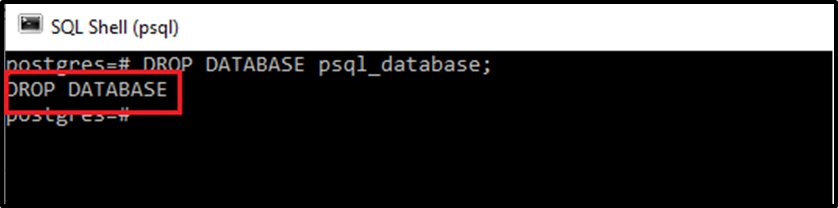
After the DROP DATABASE statement, you have to specify the name of the already existing database you want to drop/delete like this:
DROP DATABASE psql_database;
Creating a Table
We can also create a table by running the basic DDL command of a table. The basic syntax for creating a table is:
CREATE TABLE tab_name(col_name dat_type constraint_name);
The syntax is simple, you just need to specify the name of the table you want to create and within brackets, you need to specify the column names.
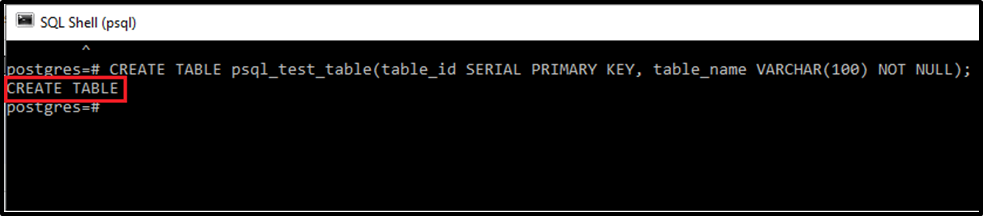
I’ll create the table name “psql_test_table”. For that, the query will be:
CREATE TABLE psql_test_table(table_id SERIAL PRIMARY KEY, table_name VARCHAR(100) NOT NULL);
Executing the above query will create a table in psql, which can be proven by:
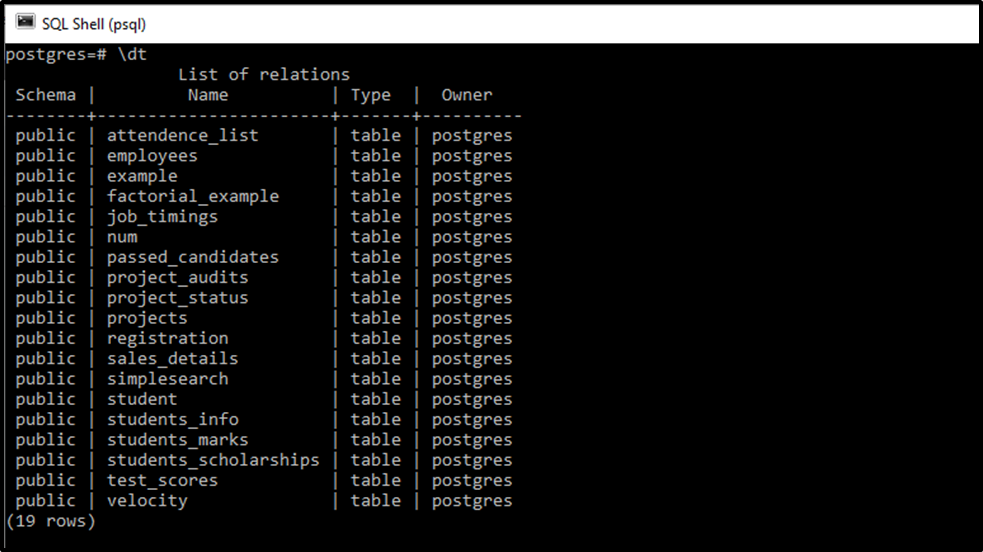
We can see the list of all the created tables in psql by running the “\dt” meta-command. The creation of a table can also be ensured by running this meta command:
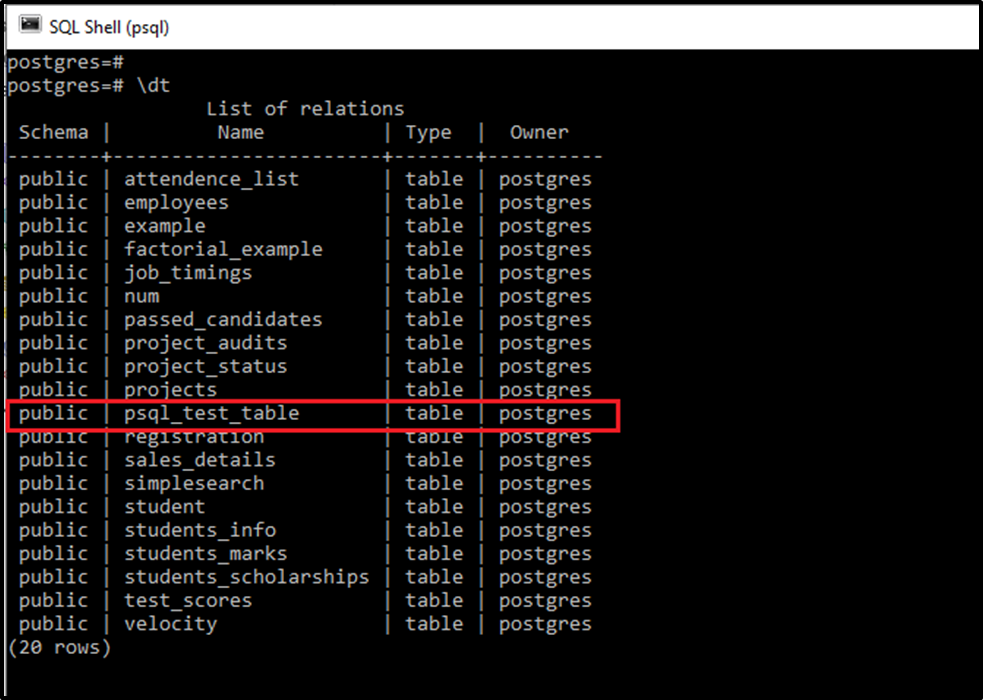
We can see the name of the newly created table in the list of tables which makes sure that it has been created.
We can also add/insert the data values in the Postgres table.
Inserting Values in a Table
To insert the values in the table we have created above, we'll be executing the following query:
INSERT INTO psql_test_table(table_name) VALUES ('table_name_1'), ('table_name_2'), ('table_name_3');We will successfully be able to insert values into the table with the above query. The insertion can be ensured if the output looks like this:

In this way, we can insert the values in the table.
Selecting the table
Now to see the inserted values in the table we will execute the SELECT query. This query will return the table in which the values are inserted. The query is:
SELECT * FROM psql_test_table;
This query will return the table with inserted values like this:
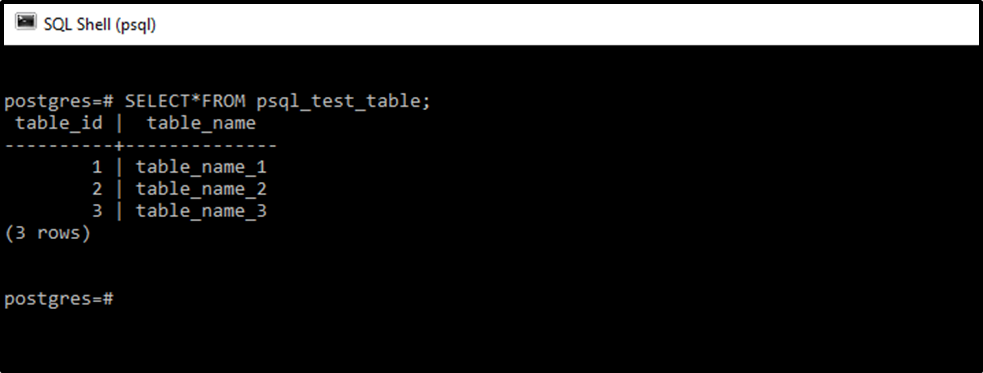
This is how we can select the table.
Rename the Table
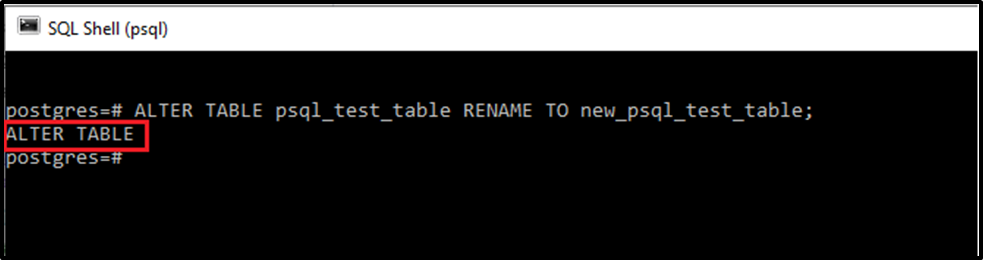
We can also rename the table by making use of the ALTER statement. The ALTER command is a DML command used to perform changes to rename the table considered above, we will write the following command:
ALTER TABLE psql_test_table RENAME TO new_psql_test_table;
The table will be successfully altered for its name by executing this command:
We will run the \dt meta-command to see if the name changes or not. Running the command returned the following output:
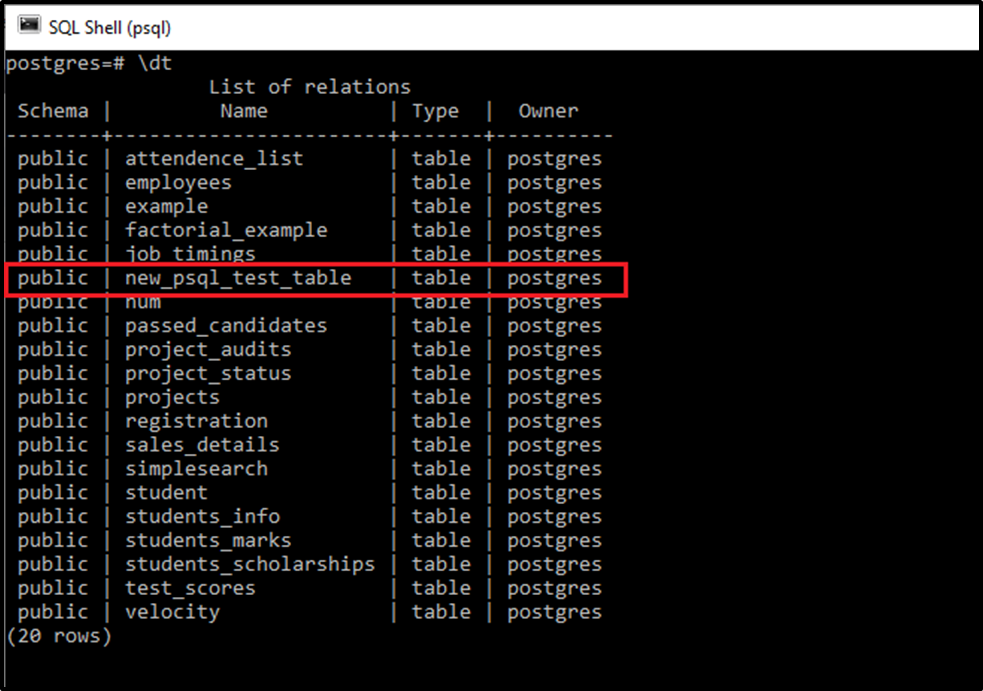
This ensures that the table has been renamed from “psql_test_table” to “new_psql_test_table”.
Dropping a Table
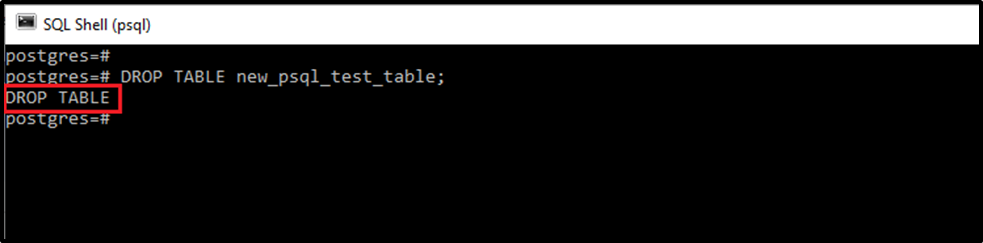
We can delete a table that is no longer in use. The syntax of deletion of our table is:
DROP TABLE new_psql_test_table;
The table is successfully dropped using this syntax.
We will execute the \dt meta-command to see if the table is still present or not. The output after running the command is:
We can see that there is no such table existing in the list of tables.
This way we can execute any Postgres query in SQL Shell and get the desired results.
Conclusion
To run PostgreSQL queries in SQL Shell or psql, first, open the psql, and access the postgres database by specifying the appropriate privileges. Once you are connected to postgres database, you can run all the PostgreSQL DDL and DML queries in psql in similar ways as you run them in pgAdmin. In this article, we have seen execution of some of the PostgreSQL queries in psql, with proper implementation, other queries can also be executed in a similar way.