
In CentOS, upgrading the PostgreSQL version can bring substantial improvements in performance, security, and access to new features. Nevertheless, it is crucial to plan and execute the upgrade process with utmost care to prevent the loss of data or any system downtime. It is also necessary to identify any potential compatibility issues that may arise with third-party applications and plugins that rely on PostgreSQL.
This article illustrates the step-by-step procedure for upgrading PostgreSQL 9 to 13 on CentOS.
How to Upgrade PostgreSQL on CentOS 7?
Upgrading the PostgreSQL version to CentOS ensures that the system is secure, stable, and efficient. To upgrade PostgreSQL from version 9 to version 13 on CentOS, follow these steps:
Step 1: Verify Upgrade:
Users can verify the existing PostgreSQL version using the following command:
$ postgres --version

Note: It is essential to back up your current PostgreSQL database before upgrading to version 13. To create a backup of the current PostgreSQL database utilizing the pg_dump command.
Step 2: Disable Access to the PostgreSQL
Before upgrading, users must disable access to the PostgreSQL database. This can be done by stopping the PostgreSQL service:
$ sudo systemctl stop postgresql.service

This command stops the PostgreSQL service.
Step 3: Add the PostgreSQL 13 Repository
To upgrade to PostgreSQL version 13, users need to add the PostgreSQL 13 repository to their system.
$ sudo yum -y install https://download.postgresql.org/pub/repos/yum/reporpms/EL-7-x86_64/pgdg-redhat-repo-latest.noarch.rpm
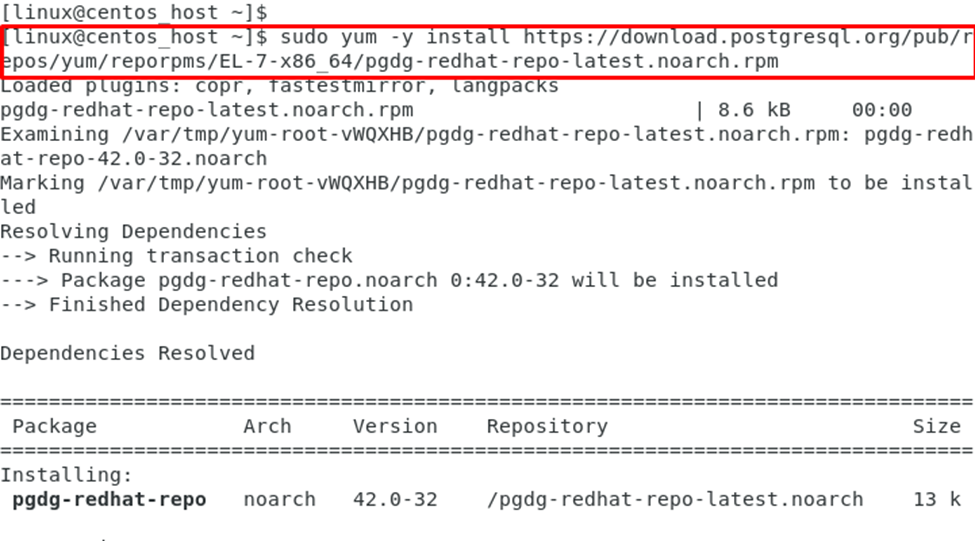
This command adds the PostgreSQL 13 repository to the system.
Step 4: Install PostgreSQL 13
After adding the PostgreSQL 13 repository, users can install PostgreSQL 13:
$ sudo yum -y install postgresql13 postgresql13-server
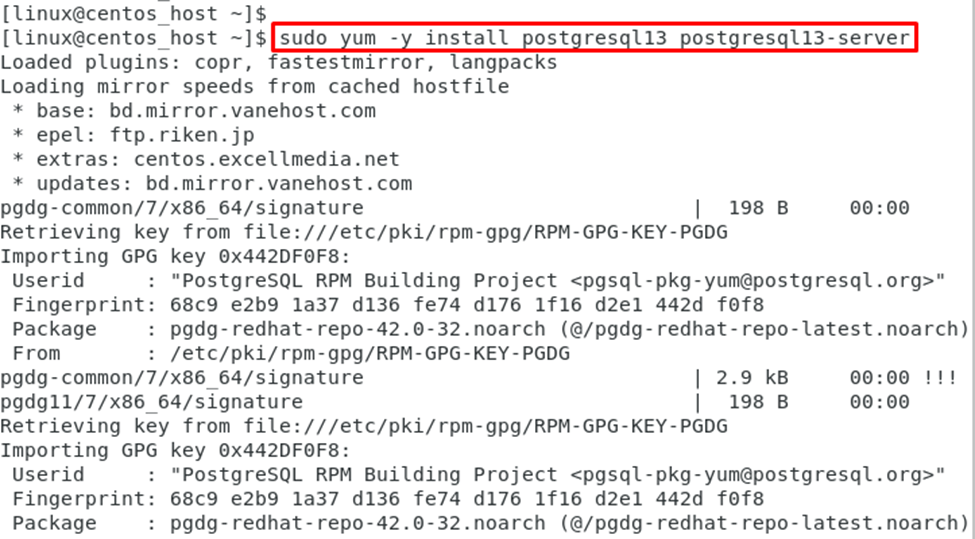
This command installs PostgreSQL 13 on the system.
Step 5: Initialize PostgreSQL
After installing PostgreSQL 13, users need to initialize the database.
$ sudo /usr/pgsql-13/bin/postgresql-13-setup initdb

This command initializes the PostgreSQL 13 database.
Step 6: Start PostgreSQL
Users can start the PostgreSQL 13 service via the below script:
$ sudo systemctl start postgresql-13

This command starts the PostgreSQL 13 service.
Step 7: Verify the Upgrade
Users can verify the upgrade by checking the status.
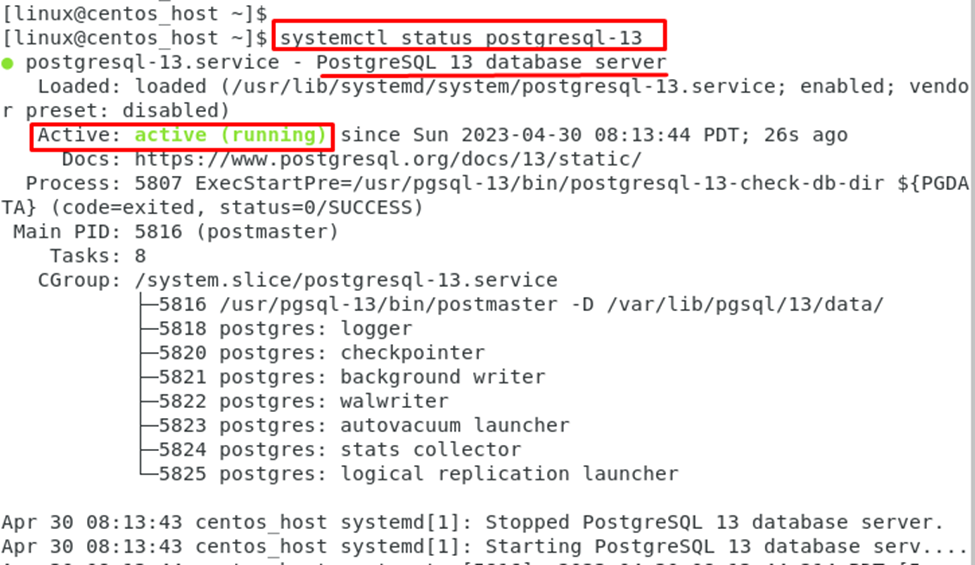
This command displays that PostgreSQL version 13 is in a running state.
That's it! You have successfully upgraded your PostgreSQL database from version 9 to version 13.
Conclusion
To Upgrade PostgreSQL on CentOS 7, it is essential to add the appropriate repository, stop PostgreSQL, upgrade PostgreSQL, restart PostgreSQL, verify the upgrade, and test the application compatibility. Performing regular upgrades can improve system performance, security, and provide new features, therefore it is essential to keep your system up to date.