Intro
pgBackRest is a comprehensive backup and continuous archiving solution for PostgreSQL, providing support for point-in-time recovery (PITR), fast multi-threaded backup and restore, as well as compression and encryption of backups, among other features. In this article, we will explore pgBackRest’s features and present how to set up a basic pgBackRest configuration.
pgBackRest supports three kinds of backups: full, incremental, and differential. The full backup copies the entire content of the database cluster, while the incremental/differential backup copies only the database cluster files that have changed since the last full backup. The incremental backup helps to reduce backup time and disk space usage. By default, pgBackRest will attempt to perform an incremental backup in order to copy the database cluster files that have changed since the last backup, but if there is no previous backup, it runs a full backup.
Features:
Parallel Backup & Restore: To improve performance and transfer during backups, pgBackRest allows you to set up multiple processes using lz4 and zstd compression algorithms. This may be specified in the --process-max parameter.
Local or Remote Operation: pgBackRest can restore and backup locally or remotely using TLS/SSH.
Full, Differential, & Incremental Backups (at File or Block Level): pgBackRest supports the following kinds of backups:
- Full backup: All the data is sent to another location.
- Differential backup: Only backs up the files that have changed since the last full backup.
- Incremental backup: Only backs up the files that have changed since the last backup.
Backup Rotation & Archive Expiration: Retention policies can be set to backup for any time frame. For example, the WAL archive may be maintained for all backups or recent ones.
Backup Integrity: pgBackRest calculates checksums for every file in backups and checks during a restore or a verify.
Page Checksums: PostgreSQL started to support Checksums in version 9.3. If checksums are enabled, pgBackrest will validate them according to the kind of backups. During full backups, pgBackrest will validate all of the checksums. During differential and incremental backups, only the files that have changed will be validated.
Backup Resume: If a backup is interrupted, it may be restored. Files that were already copied are compared with the checksums. This saves time because recalculating the checksums is faster than retransmitting data.
Streaming Compression & Checksums: Compression and checksum calculations are performed while the files are being copied to the repository.
Delta Restore: PgBackRest saves the checksums for every backup file so as to speed up any restore. In the case of a Delta Restore, files not present in the backup are removed, and checksums are created for the rest of the files. The files that match the backup stay the same, while the rest are restored.
Parallel, Asynchronous WAL Push & Get: The Push and Get commands are available to push and get the WAL to and from the archive.
Tablespace & Link Support: Tablespaces and directory links are supported. Tablespaces can be remapped to any location. Additionally, links can be restored to their original locations, remapped, or restored as files or directories within the cluster.
S3, Azure, and GCS Compatible Object Store Support: PgBackRest’s repository can be stored on Amazon S3, Azure, and GCS-compatible object stores.
Encryption: PgBackrest can encrypt the repository to secure stored backups.
Compatibility with ten versions of PostgreSQL: PgBackRest is committed to maintaining compatibility with the five supported versions of PostgreSQL and the five end-of-life versions.
Installation Guide:
To install pgBackRest on an Ubuntu operating system, you may run the following commands:
sudo apt update
sudo apt -y install pgbackrest
If pgBackRest is not provided in your distribution, you may find more information on https://pgbackrest.org/user-guide.html#installation
Demo: Performing Your First Backup
For this demo, we will configure pgBackrest with Postgres and simulate a backup. This is a simple setup in which no replicas are used.
Open the Postgres config_file with your preferred text editor. To find where your config_file is located, you may enter the following on a terminal:
sudo -iu postgres
psql
SHOW config_file;
This will display the following:
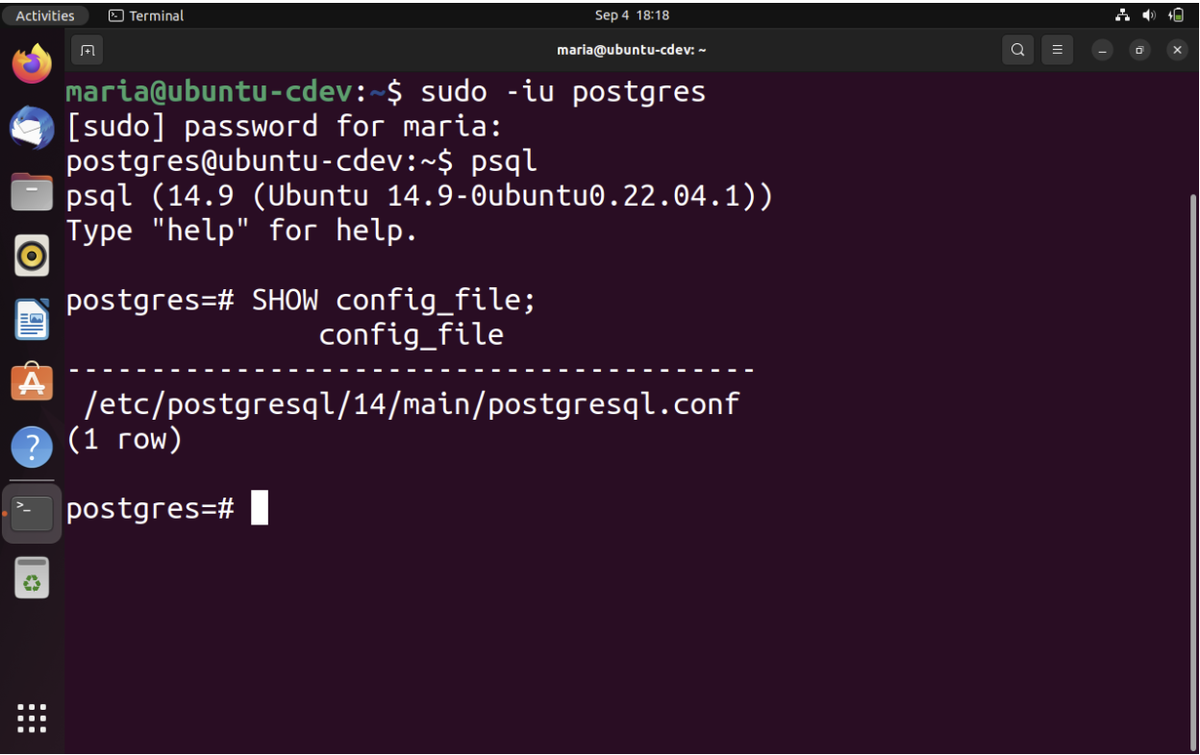
Once you find your file, edit the following parameters:
listen_addresses = '[host IP address]'
password_encryption=’scram-sha-256’
archive_mode = on
Now, reset the service so that the changes take effect:
sudo systemctl restart postgresql-[version].service
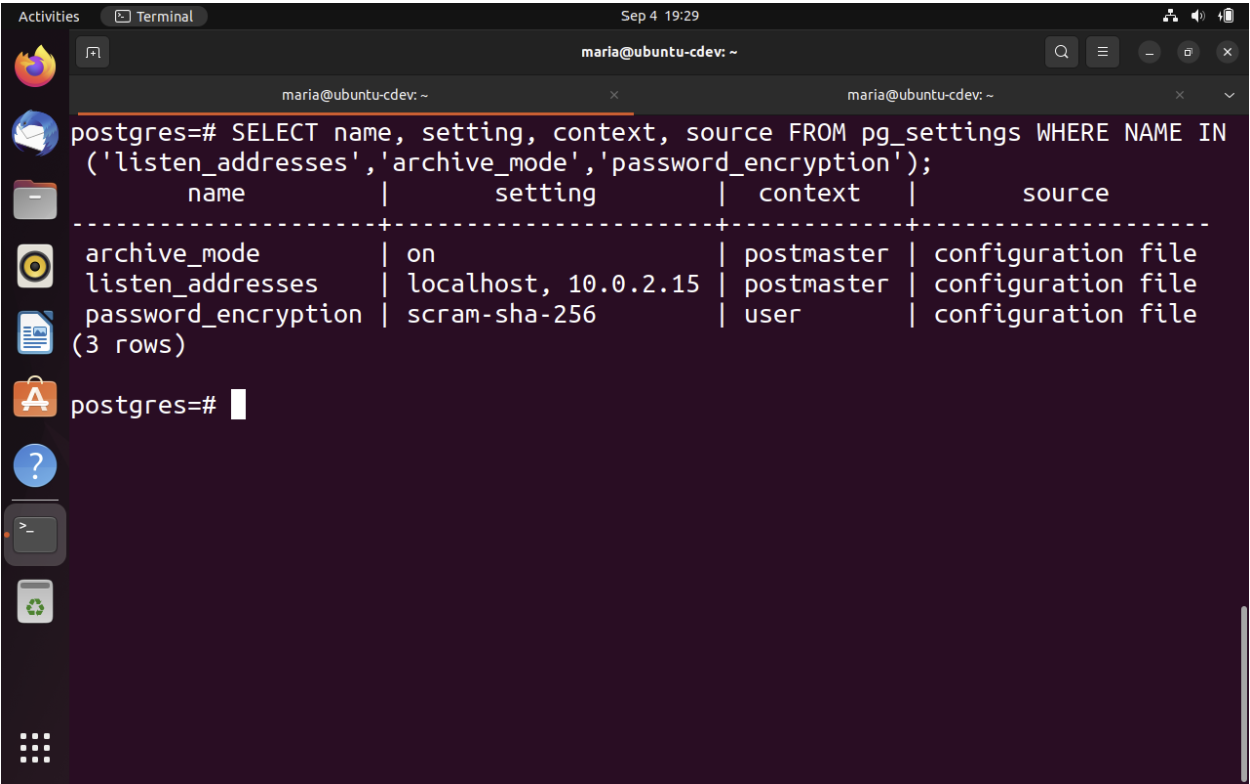
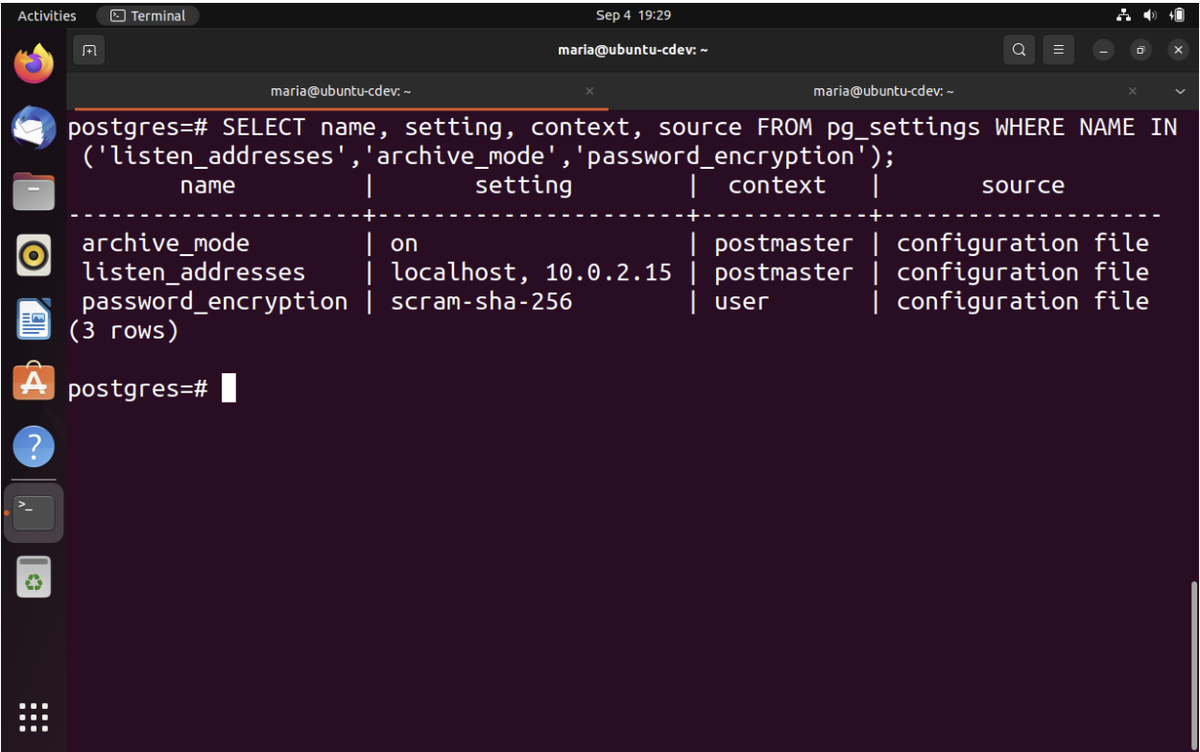
To check that the parameters have been updated, you may type the following commands and query:
Sudo -iu postgres
Psql
SELECT name,setting,context,source FROM pg_settings WHERE NAME IN ('listen_addresses','archive_mode','password_encryption');
This will display a table with the updated values:
Create the pgBackRest backup repository:
sudo mkdir -p /var/lib/pgbackrest
sudo chmod 750 /var/lib/pgbackrest
sudo chown postgres:postgres /var/lib/pgbackrest
sudo chown -R postgres:postgres /var/log/pgbackrest
Create a backup for your pgBackRest configuration file:
sudo cp /etc/pgbackrest.conf /etc/pgbackrest.conf.backup
Now we are going to generate a key to encrypt the repository:
openssl rand -base64 48
Edit the pgbackrest.conf file using your preferred text editor. Paste the following in the file:
[global]
repo1-cipher-pass=[Copy your previously generated key]
repo1-cipher-type=aes-256-cbc
repo1-path=/var/lib/pgbackrest
repo1-retention-full=2
log-level-console=info
log-level-file=debug
[demo]
pg1-path=/var/lib/postgresql/[version]/main
Now, we can create our stanza, which we’ll call demo, like the name of the repository:
sudo -u postgres pgbackrest --stanza=demo stanza-create
Now that everything is set up, we can perform a backup. First, open your Postgres config file and edit the archive_command parameter as follows:
archive_command = 'pgbackrest --stanza=demo archive-push %p'
For the changes to be applied, we need to reload the database:
sudo systemctl reload postgresql-[version].service
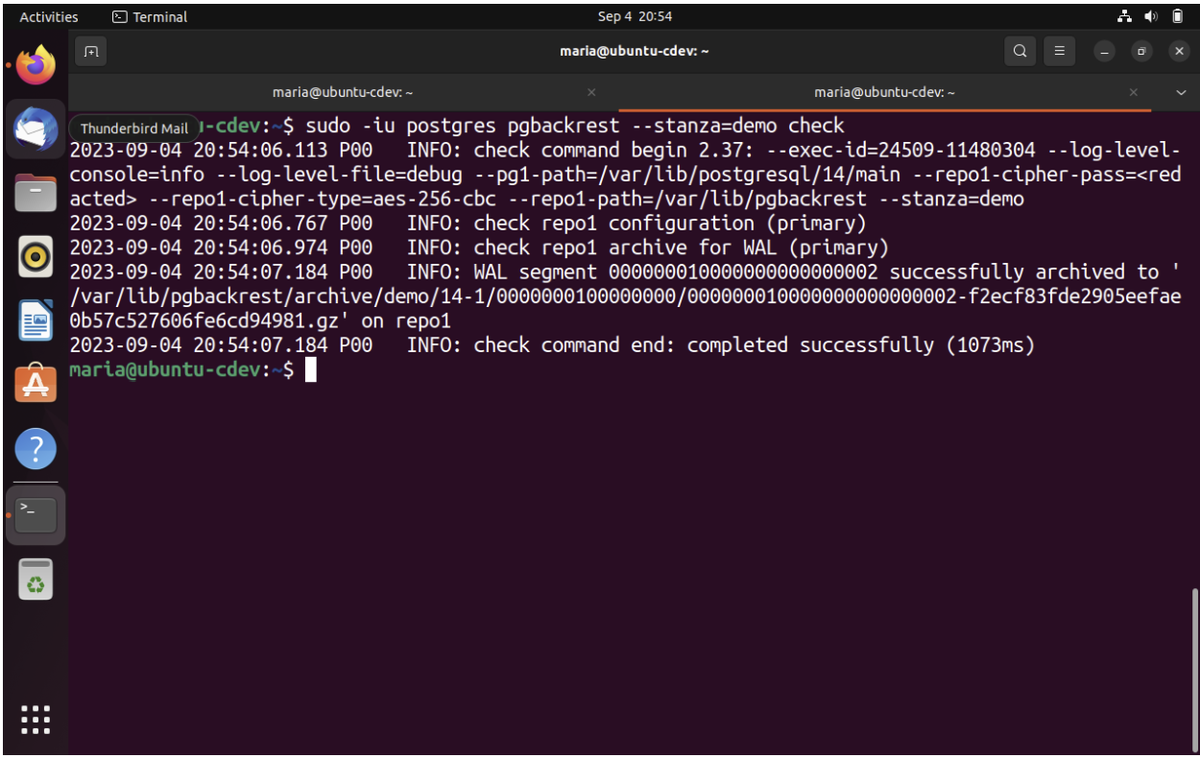
Now, let’s check if our stanza is okay:
sudo -iu postgres pgbackrest --stanza=demo check
Now we can finally perform the backup with the following command:
sudo -u postgres pgbackrest --stanza=demo --type=full backup
This command could take five minutes by default because of the checkpoint_timeout parameter on PostgreSQL. A checkpoint is a point in the sequence of transactions in which changes to data files are guaranteed to be on disk. The server performs a checkpoint every scheckpoint_timeout seconds or if the max_wal_size parameter is about to be exceeded. Though reducing the scheckpoint_timeout results in more frequent checkpoints (thus speeding up after-crash recovery because there are fewer datafiles to recover), it is not recommended because constantly writing dirty pages to disk might overload the I/O system by increasing traffic to the WAL log.
Now we must confirm that our stanza exists and has a full backup:
Sudo -u postgres pgbackrest info
Let’s simulate a system administration disaster by deleting the database data files.
First, stop the postgresql service:
sudo systemctl stop postgresql-[version].service
sudo find /var/lib/pgsql/12/data -mindepth 1 -delete
If we try to start the database, this will fail as follows:
sudo systemctl start postgresql-[version].service

Now that we have deleted all these data files, let’s go ahead and restore them:
sudo -iu postgres pgbackrest --stanza=demo --delta restore
We should be able to start postgresql again:
Sudo systemctl start postgresql-[version].service
Check whether pgBackRest is working:
sudo -u postgres pgbackrest --stanza=demo check
Finally, it is good practice to perform another backup after a disaster instance:
sudo -u postgres pgbackrest --stanza=demo --type=full backup
Conclusion
In this article, we discussed pgBackrest’s features, as well as how to install and perform a backup on a sample database.
Recapping the steps we took in our backup:
- Update the archive_mode and encryption parameters in your configuration file
- Create the pgBackRest backup repository
- Create a backup for your pgBackRest configuration file
- Generate a key to encrypt the repository
- Update the pgbackrest.conf file to add cypher and path information for the repository
- Create a stanza
- Update the archive_command parameter in the postgres configuration file as 'pgbackrest --stanza=[stanza_name] archive-push %p'
- Stop the PostgreSQL service and delete its data files to simulate a disaster
- Restore the database with “sudo -iu postgres pgbackrest --stanza=[stanza_name] --delta restore”
Referenced Works:
[1] https://pgbackrest.org/
[2] https://www.crunchydata.com/blog/how-to-get-started-with-pgbackrest-and-postgresql-12
[3] https://www.postgresql.org/docs/current/wal-configuration.html
[4] https://pgbackrest.org/configuration.html#section-general/option-process-max
[5] https://pgbackrest.org/user-guide.html#installation
Stay connected with Command Prompt. Subscribe to our Substack Newsletter here.
Need Help?
Command Prompt is the world’s oldest dedicated Postgres services and consulting company, offering expert support for performance optimization and troubleshooting. Contact us today.